Welcome to my RV Renovation Series! In my last step I removed the awning and started to peel off some of the damaged roof plywood and stopped to make some decisions. Now it’s time to finish removing all the water-damaged wood so I can continue with my RV rubber roof replacement
WARNING: This is really just a rough draft of the post, a collection of photos with captions. I’ll be on the road for a few months and won’t have time to complete these posts until after, but for those of you who’ve written wanting to see the rest of the project, hopefully this is better than nothing. Thanks for your patience until then!
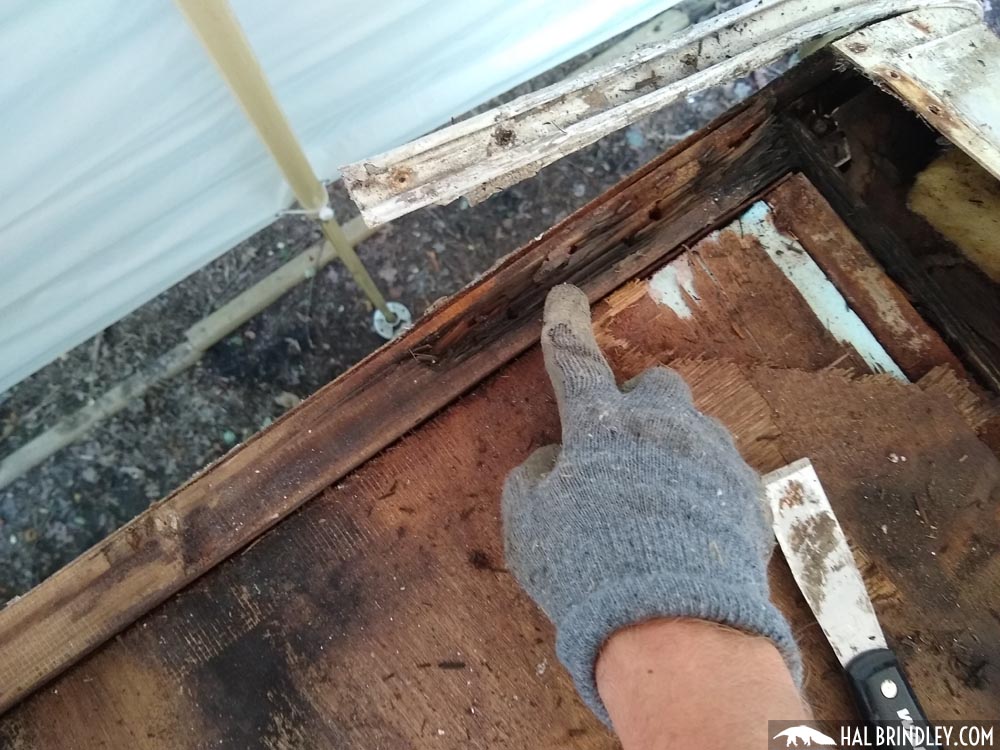
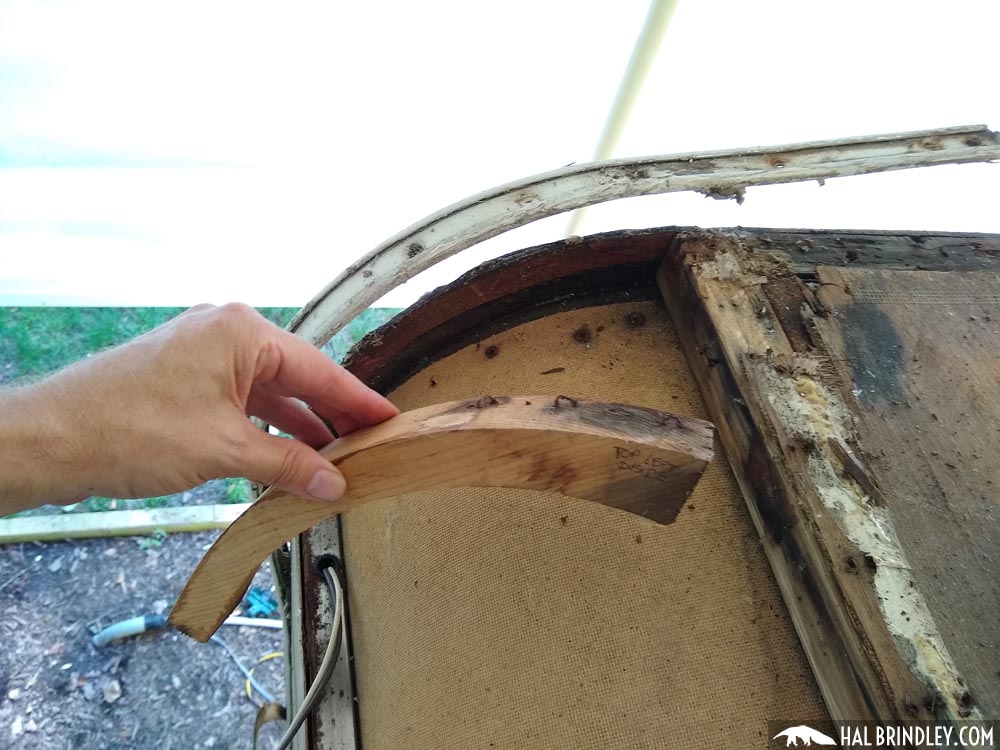
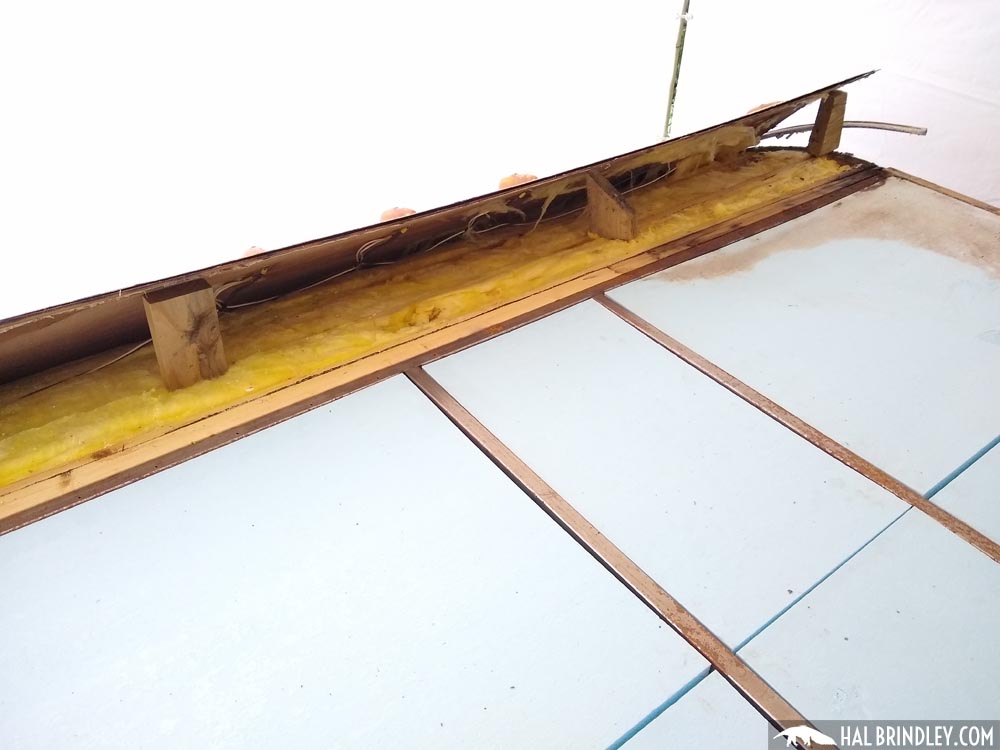
Now it’s time to get serious about removing damaged wood. There is wood framing (approx 1.5″ x 1.5″) laid in a steel channel running along the length of the roof at each side. This is used for fastening roof trim edging. Mine was pretty rotten in a few places.
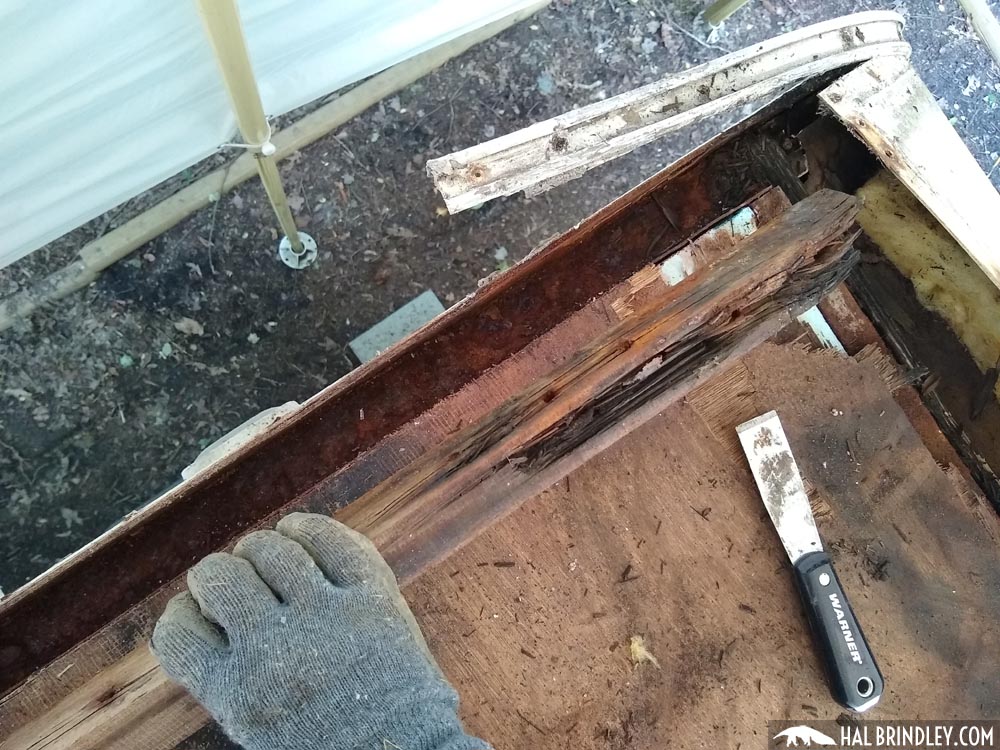
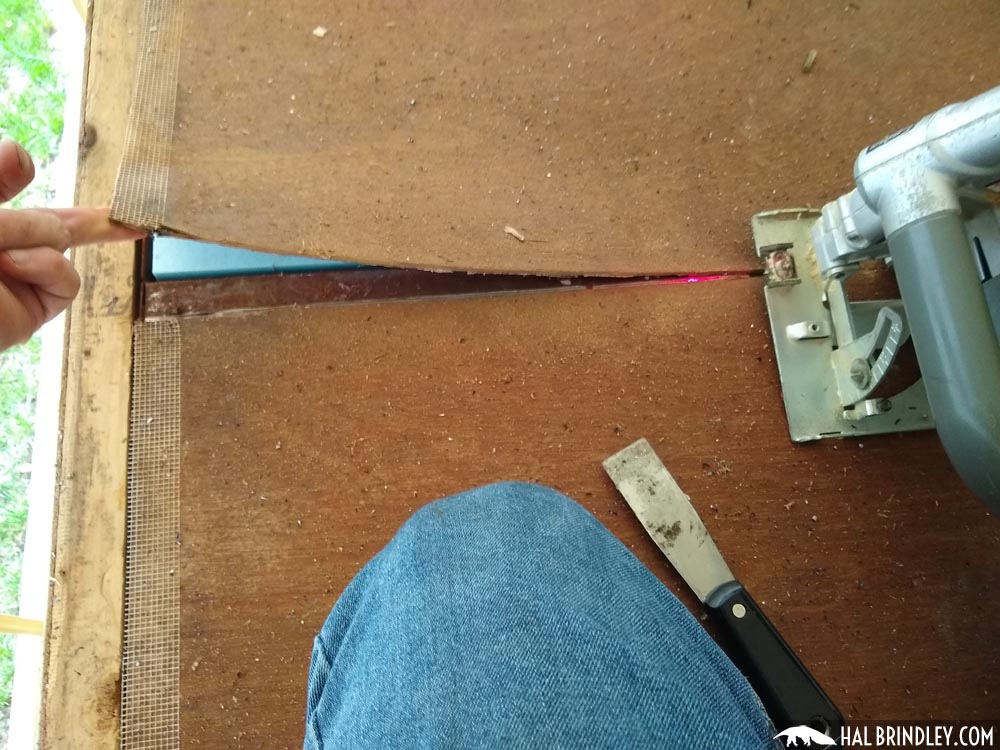
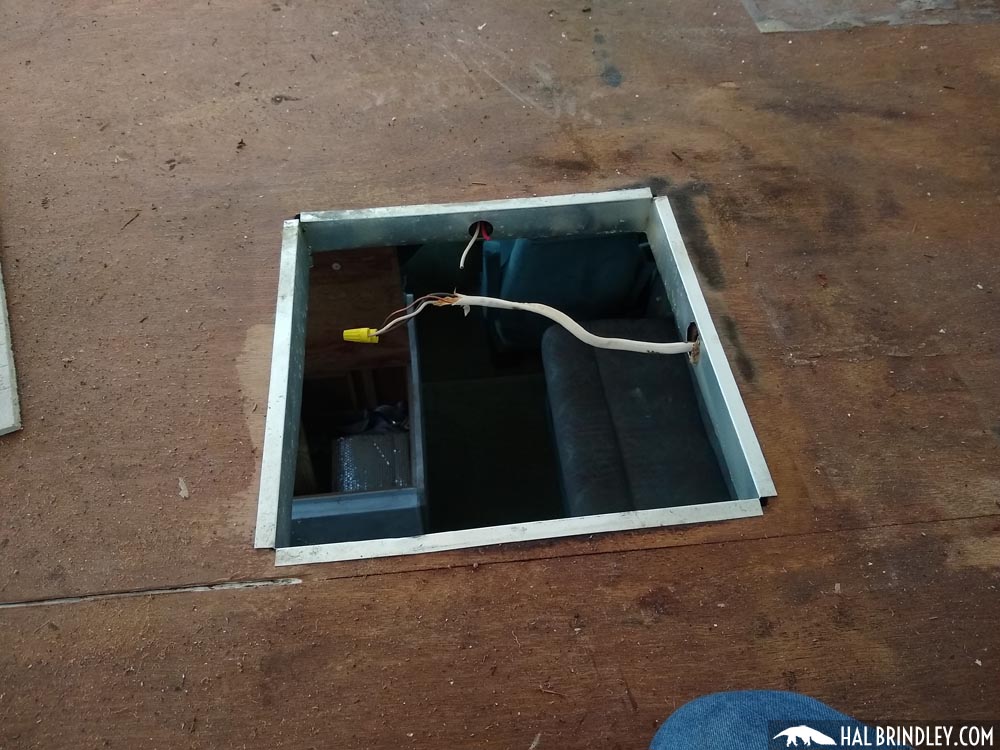
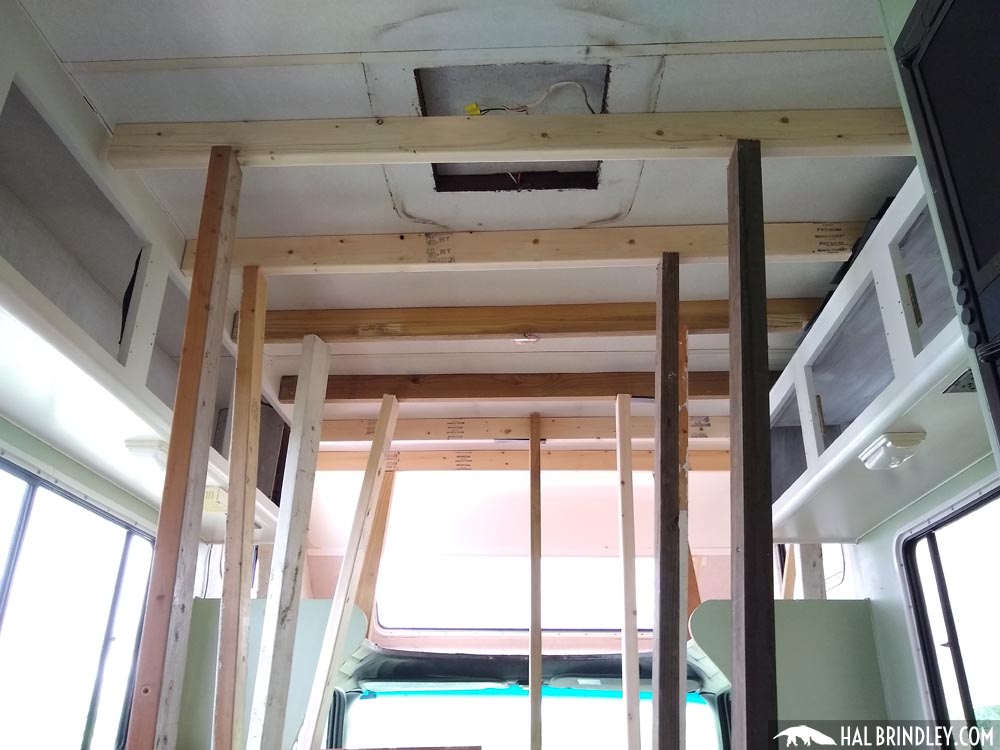
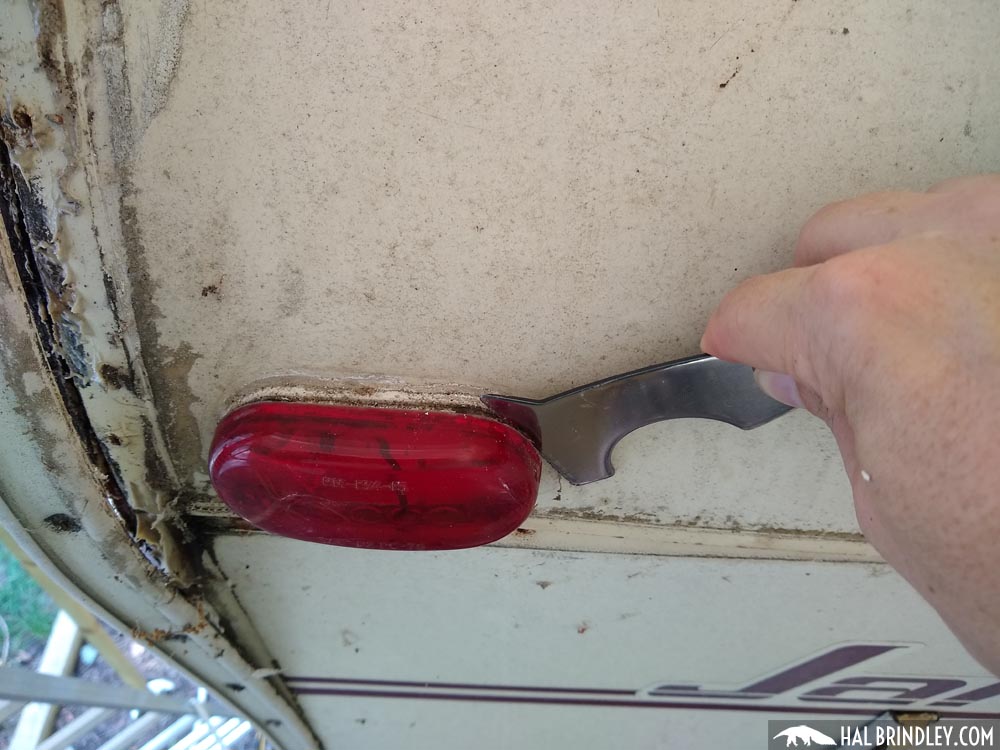
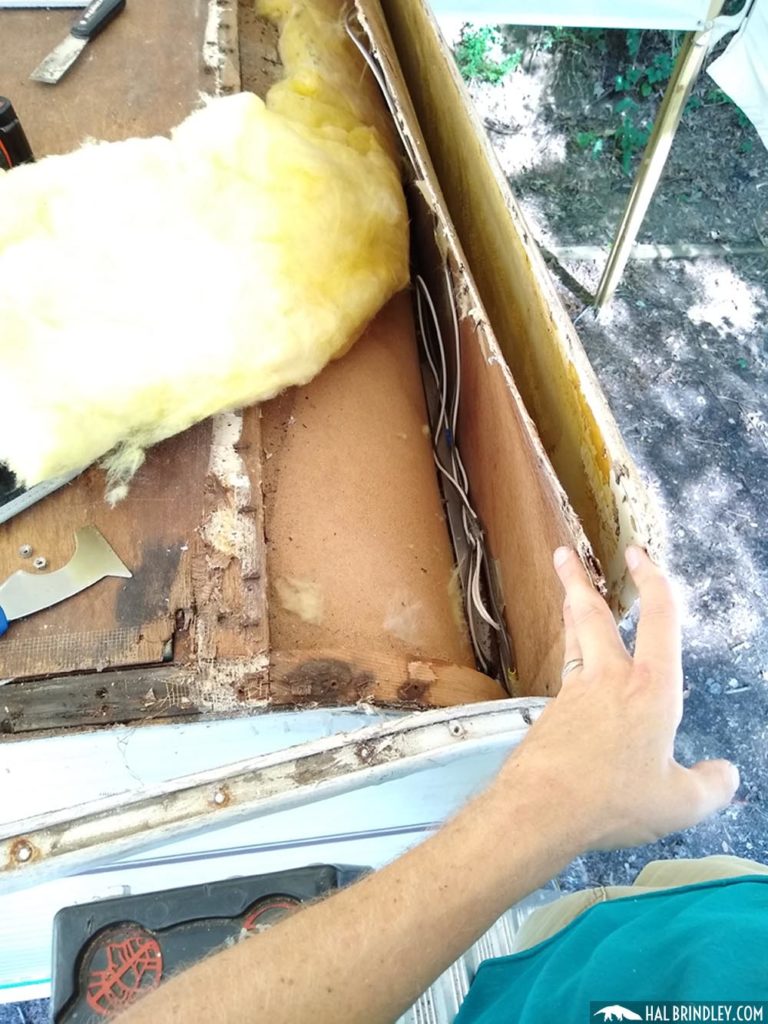
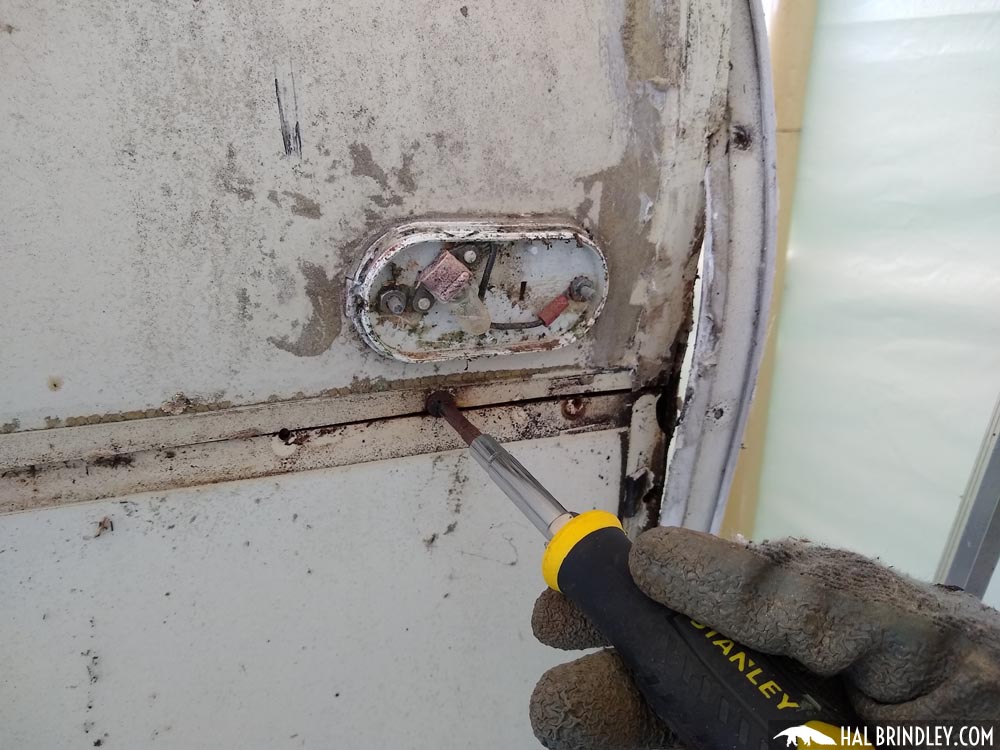
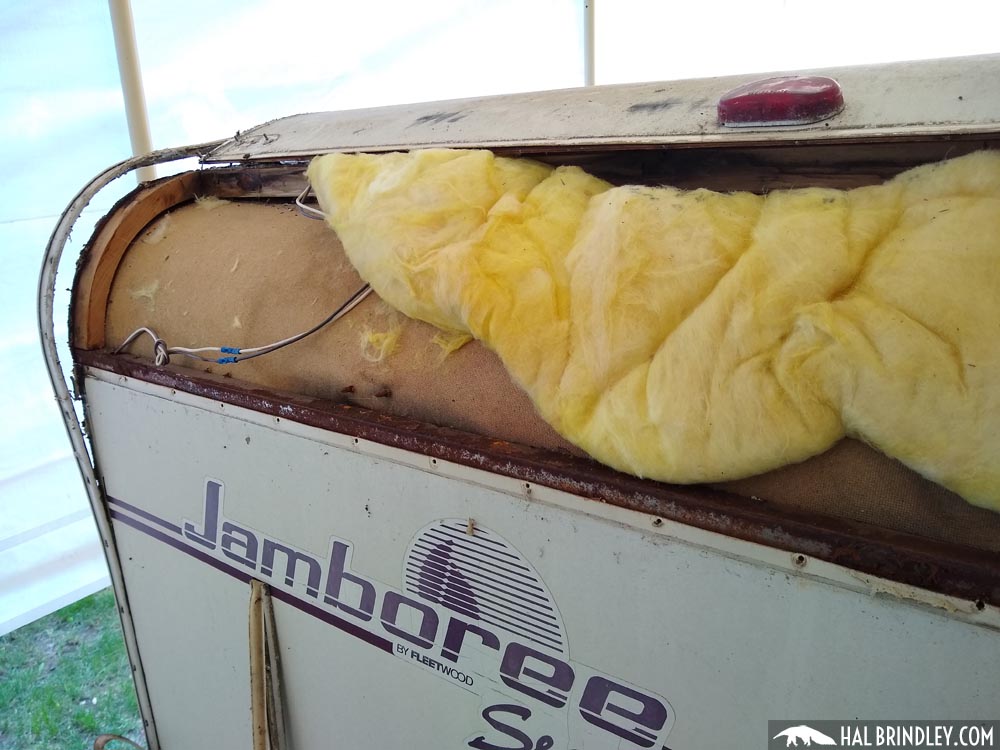
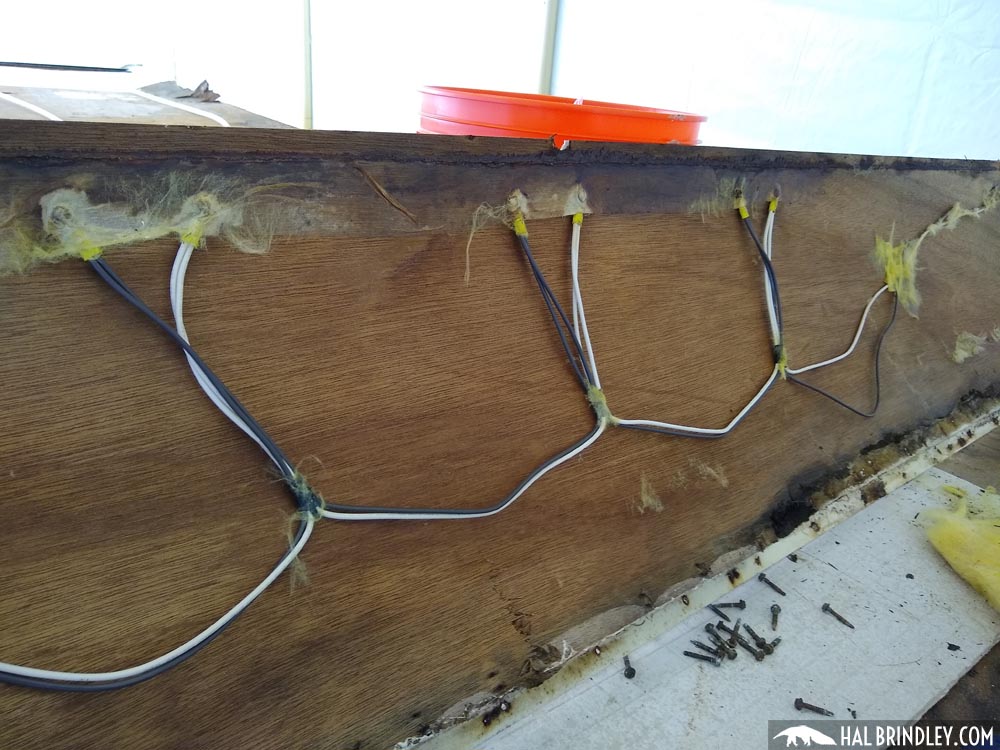
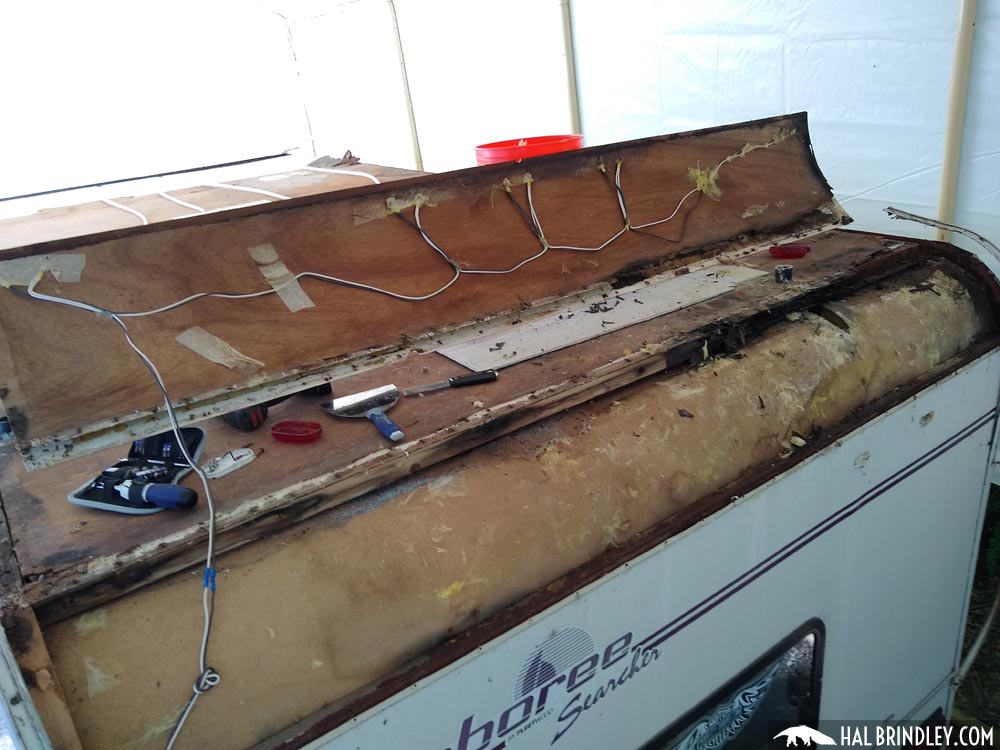
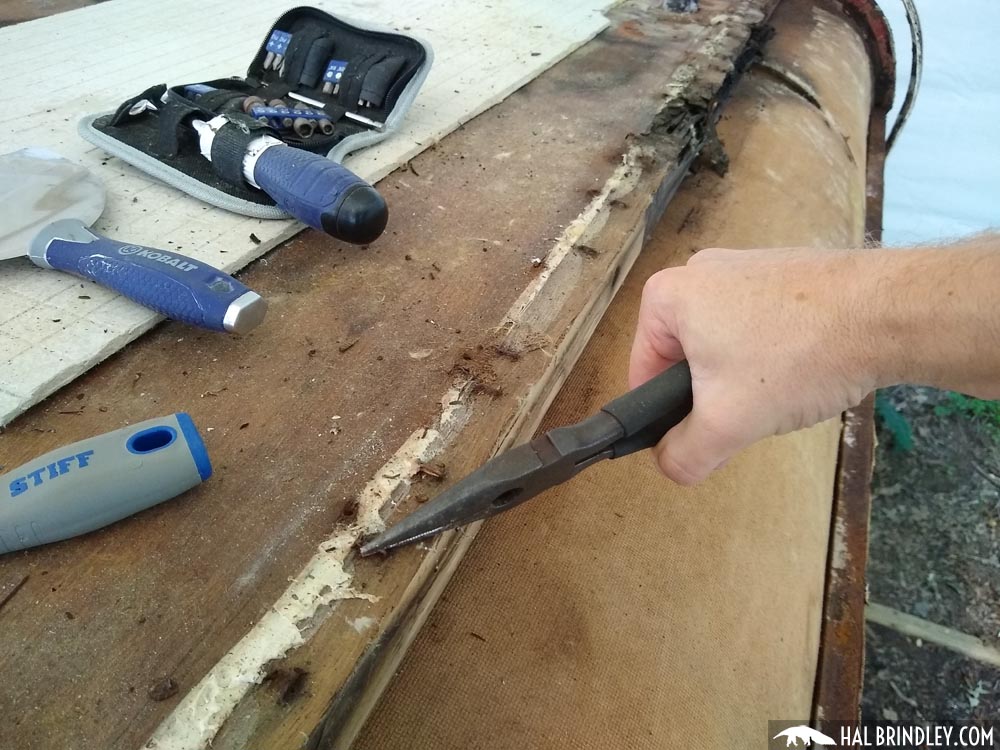
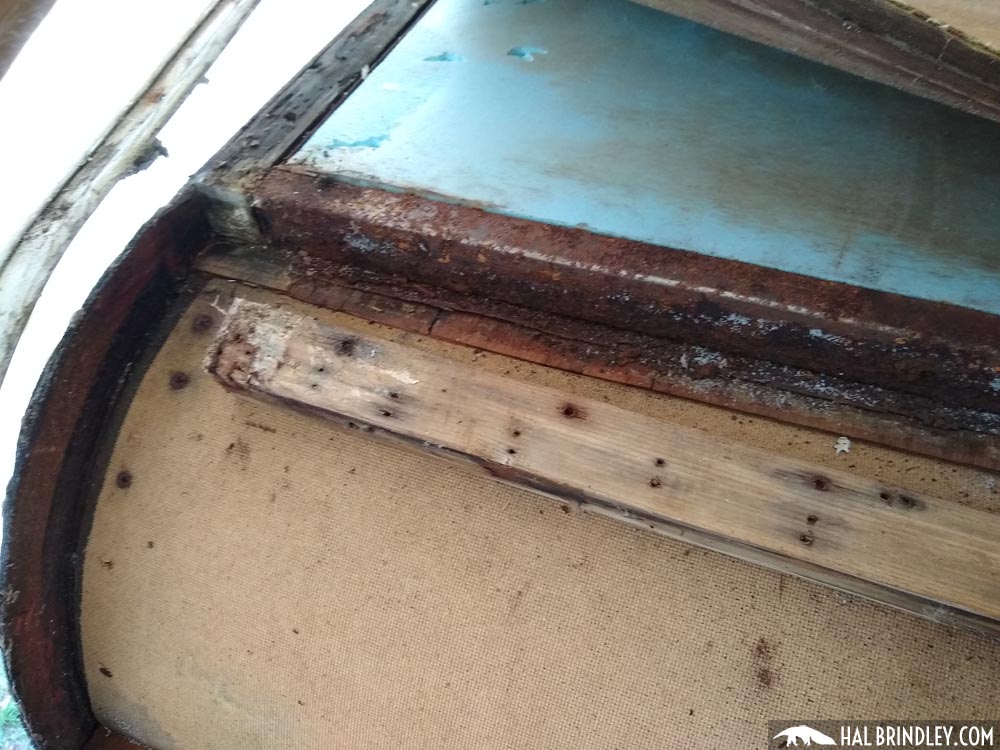
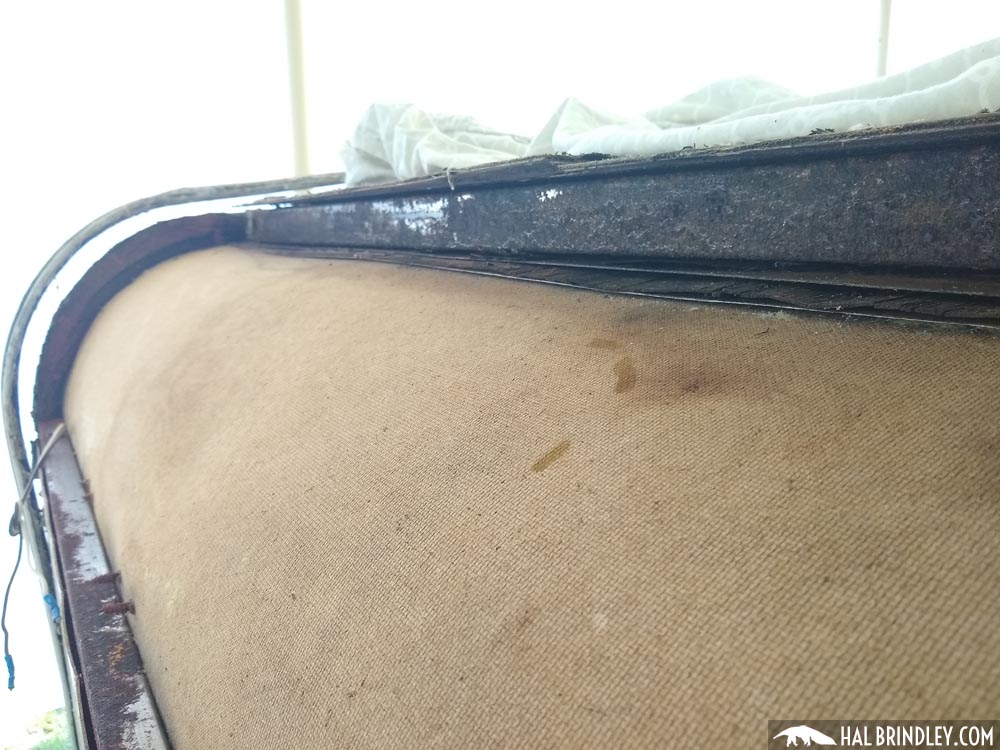
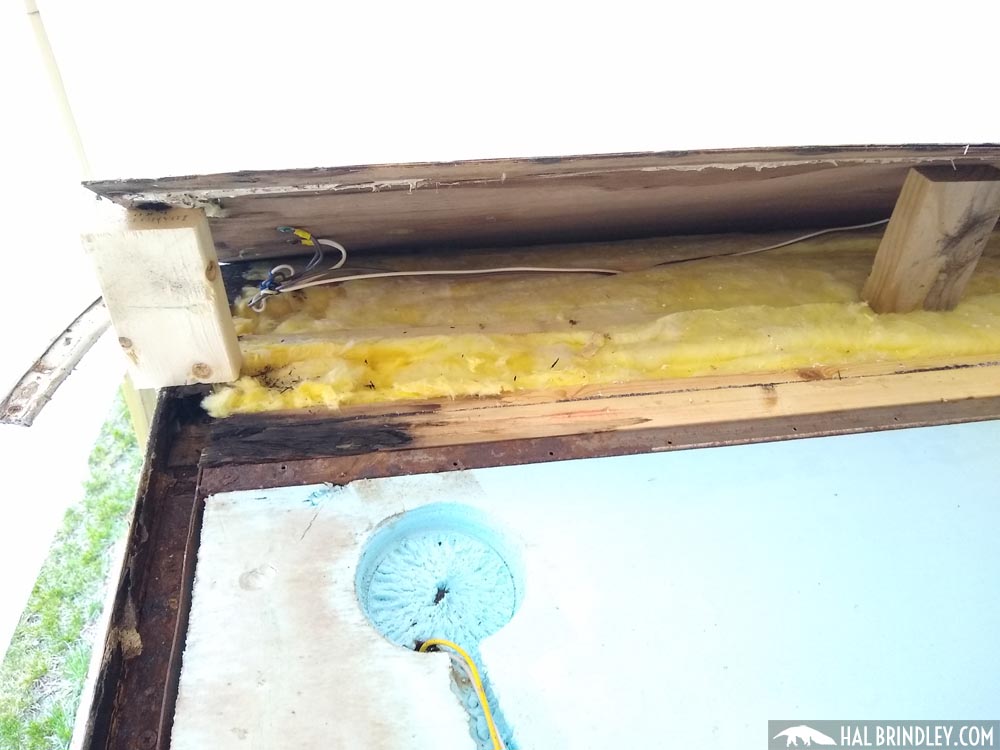
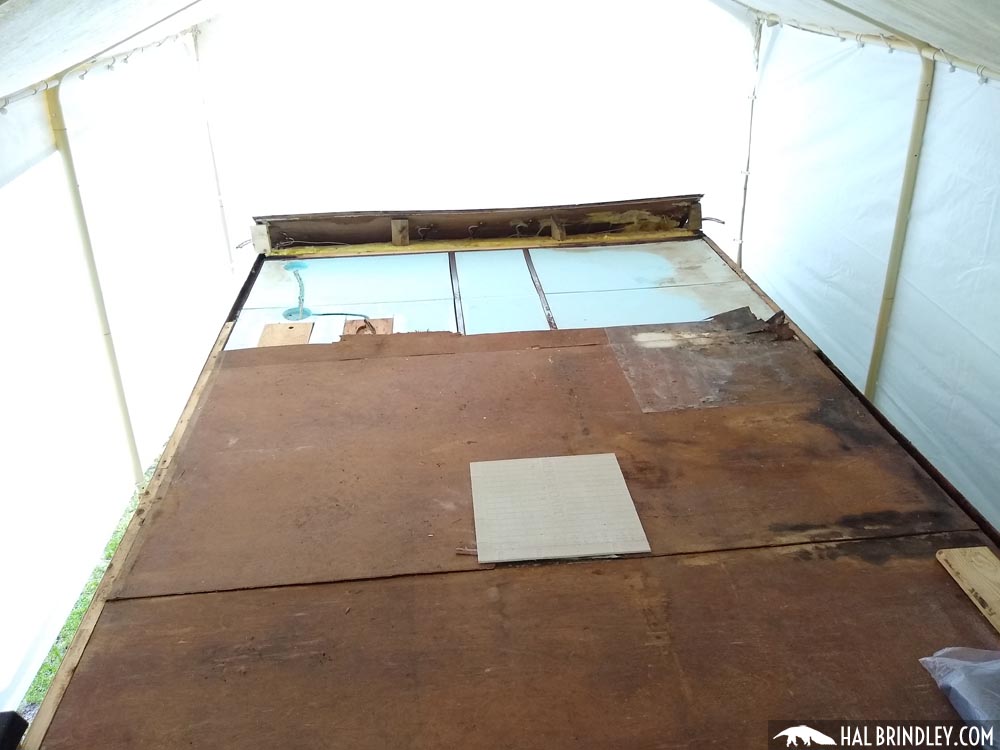
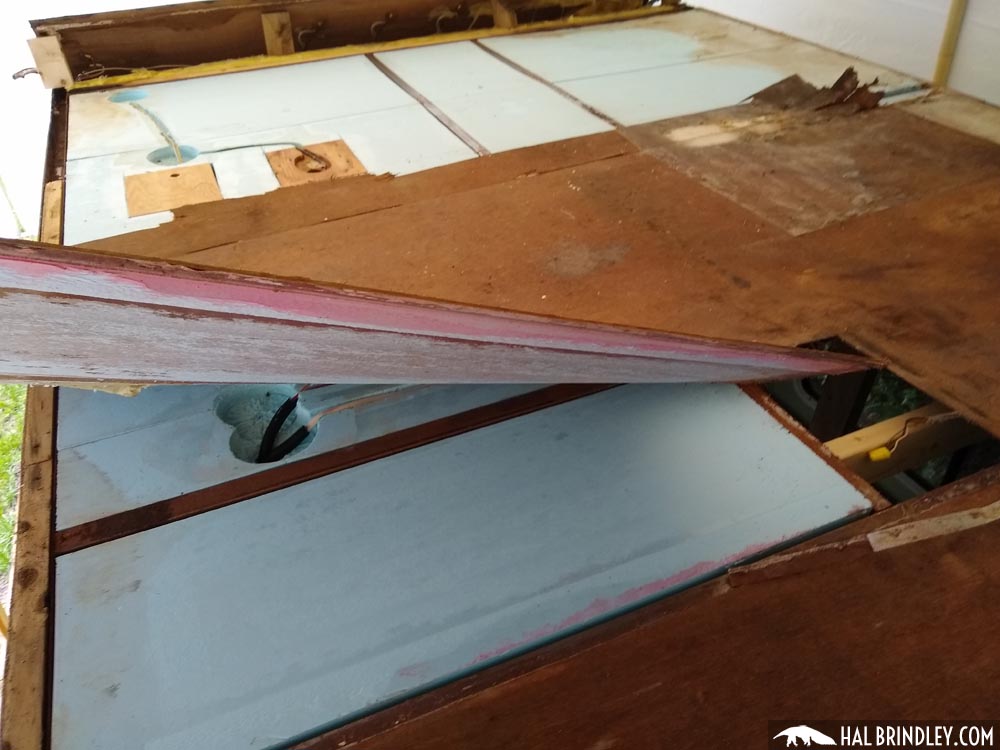
I had a good deal of water damage in the wood framing next to the roof plywood.After pulling out a damaged section I can see that this piece just sits in a steel channel and is screwed down. It’s roughly 1.5 x 1.5 inches.Here’s the other end of the same framing piece, totally destroyed by water damage. No worry, it’s easy to replace! (that comes in next post.)I decided to save one piece of roof ply but in order to keep it, I had to carefully saw though the the thin adhesive metal backing strip the joins this joint from underneath.I used a circular saw set to a depth that just barely dug into the steel framing below.In some spots the blade didn’t reach deep enough and you can see the metal plate still intact. I went back over these sections hand holding the saw with a deeper blade.The metal frame around the AC hole was screwing up my circular saw so time to remove it.There were two little weld spots in the corner of the metal frame…so I just popped it apart with a reciprocating saw and pulled it out, being careful not to damage the wiring running through it.Pulling up the roof plywood weakens the structural strength of the roof (it’s the lamination of layers that holds the whole thing together) so before peeling it off I braced the whole roof from inside the camper.Another look at the roof bracing inside the camper. Just 2×4’s wedged into place.Next I took a peek at the water damage where the roof meets the back transition. I had already removed the screws from enough of the side trim to peel up the fiberglass transition piece. At this point I was thinking I should replace the plywood piece beneath.To get to the plywood beneath the fiberglass layer of the transition I needed to remove the trim molding below the marker lights. I pried out the vinyl trim insert and unscrewed the screws.Lifting off the piece of trim I could see the junction between the transition and the vertical back wall of the camper.There are a few screws holding the fiberglass (& plywood beneath) in place.First I needed to see how the back marker lights were attached to the transition. The red caps simply pry off with a flat blade or screwdriver.Two lock nuts are tightened down over bolts that run through from the back side of the plywood & fiberglass layers. These nuts make the electrical contact from the light fixture to the supply wires on the inside of the transition.I removed the lock nuts and then pried off the light fixture with a scraper and the posts are now visible with a flat lock washer holding them in place.On the inside of the transition piece all the marker lights are wired in parallel from one to the next, and power feeds through the posts (the bolts). There is a piece of insulation in here which I pulled out of the way to get a better look. Also note how the transition is a sandwich of 1/8 inch plywood and a thin fiberglass panel, contact cemented together for lamination strength.Another look at the wiring inside the rear transition. The power supply originates from this corner in the back left of the camper.Now I knew I could take it all off in one piece so I unscrewed the couple of screws holding the bottom edge in place.then I lifted the whole transition piece up and laid it on the roof. There was plenty of slack in the supply wires (at left) to do this.Notice I missed a screw and cracked the fiberglass. Dang.Another look at the supply wires coming in to the rear marker lights, with crimp connections tying it together.A look at the wiring inside the transition piece and how it runs between each marker light.There is an O-ring at the end of each pair of wires that transfers power to the posts: the bolts running through to the light fixtures.Another look at the electrical supply coming in, with plenty of slack.Now back to the wood damage. The rounded corner framing here looks pretty decent and can be saved.The corner framing on this side has crumbled away to nothing! Yikes! This will get replaced in the next post. Also the paneling that lines the roof of the closet looks a little crappy but I think I can save it.An overview of the inside of the transition. Just an empty space with insulation inside and some wiring! And virtually no support framing.The wood framing across the top of the transition is pretty messed up too. That will have to go.Next I clipped off the supply wires just above the crimp connections. This is only 12 Volt so don’t freak out about the power, but the key has to be in the ignition for these to receive power anyway.There were a bunch of staples holding the top edge of the transition down to the roof plywood. I pulled them out with pliers.I decided I would pull this piece out to use as a pattern to cut the replacement piece for the other side. First I marked it so I would know which way to fit it back in.There were some small staples screws holding it in place, mostly rusted. It came out disturbingly easily.But at least this corner is in nice shape!Next I started pulling out the piece of wood framing across the top of the transition. It was merely screwed into the metal framing visible here (and very rusty)A closer look at the water damage on the right side after cleaning it up. The ceiling paneling looks a little crappy but I think I’m going to work with it, perhaps add another thin panel layer inside. It would be really tough to replace this piece because it’s sandwiched in!This is the space between the closet and the bathroom where the plumbing vent pipe comes up.Another look into the space between the closet and the bathroom. Looks like kind of a waste of space. Maybe I’ll set a medicine cabinet into here from the bathroom side?Here’s a look at how the ceiling inside the camper is attached to the steel framing and then the curved transition ceiling overlaps it from inside.Next I moved on to the front of the camper. I propped up the front transition piece which, like the back one, is a layer of 1/8 inch plywood with a fiberglass panel contact cemented together.The front transition has the same deal with the front clearance lights wired in parallel through it. The wood framing looks good enough here so I kept it.OK, time to lift off this sheet of ply. As stated earlier I decided to keep the sheet at the bottom of this photo because it was essentially undamaged. In retrospect I probably should have kept the one I’m about to pull off. You’ll soon see what a pain it is to replace!Carefully lifting up this sheet of 1/8 Inch ply from the roof. The glue between the ply and the foam insulation comes apart pretty easily. It basically pulls off a thin layer of the foam.Here’s a look at all the wiring beneath this piece of ply and sandwiched inside the ceiling. Also you can see how the steel framing is configured. Not sure what that wood box is for on the right? There’s no opening inside. And still not sure why a second, orphaned pair of wires runs to the AC opening. Somebody must have changed something over the years.An overview of the front of the camper with 2 sheets of roof ply removed.Some of the steel framing had old srew and nail heads still fastened. I pulled out the ones I could and the rest I either sawed off or nipped off with a grinder wheel.I scraped up as much loose rust as a I could from the steel framing and then vacuumed up all the mess.