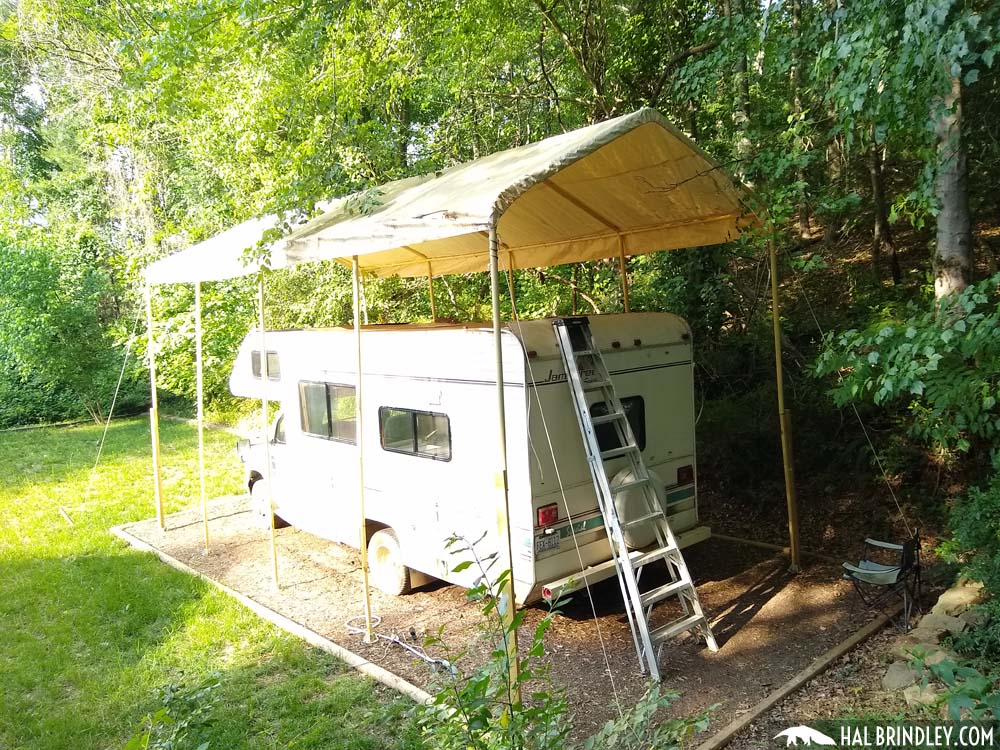
Welcome to my RV Renovation Series! Now that the RV roof is gone, my camper is very vulnerable to water. So the next thing I have to do is prepare for rain. I have a ShelterLogic 10 x 26 Sheltermax Canopy jacked up on wood legs to act as a work space, but because it’s so high up (so I have room to work on the roof), even the slightest wind could still blow water into my camper. The goal here is to fix all the water damage, not create more! So it’s time to enclose my RV canopy.
RV Canopy Enclosure, Getting Rain-Ready
I ordered a ShelterLogic Canopy Enclosure Kit for about $115. It includes side walls and two end walls, one of which is zippered so you can roll it up like a garage door.
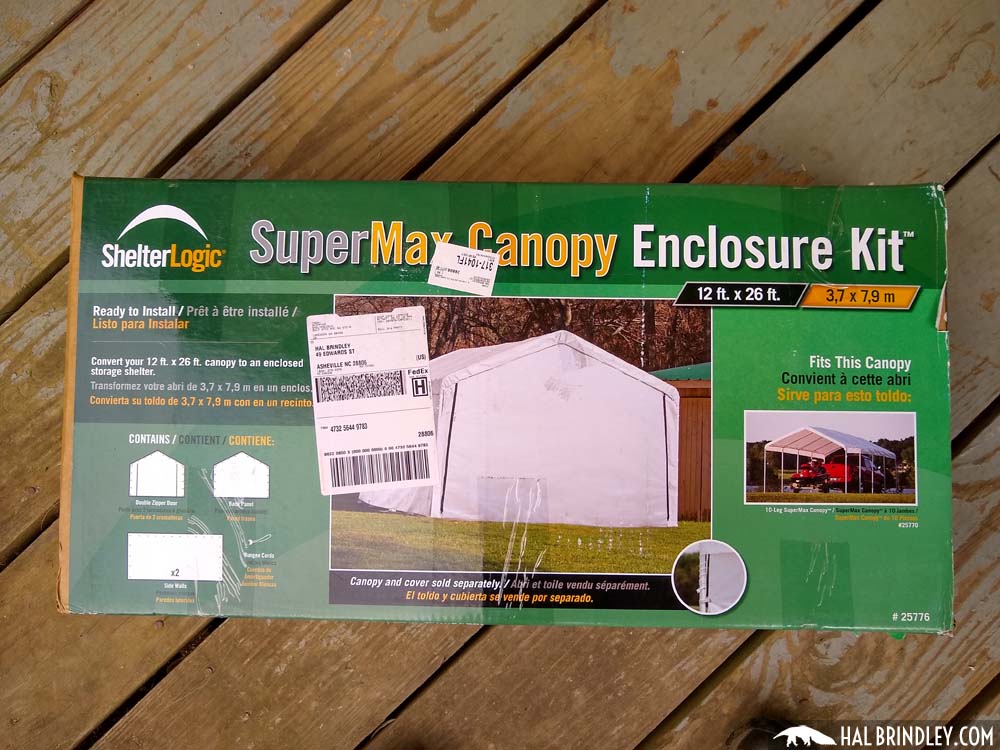
Keep in mind, these only extend down as far as the original legs. This canopy was designed to fit a car and they don’t make one tall enough for an RV. But still that will provide all the rain protection I need to keep the roof dry. Plus I’ll still get good light and air flow and room to move ladders and materials around.
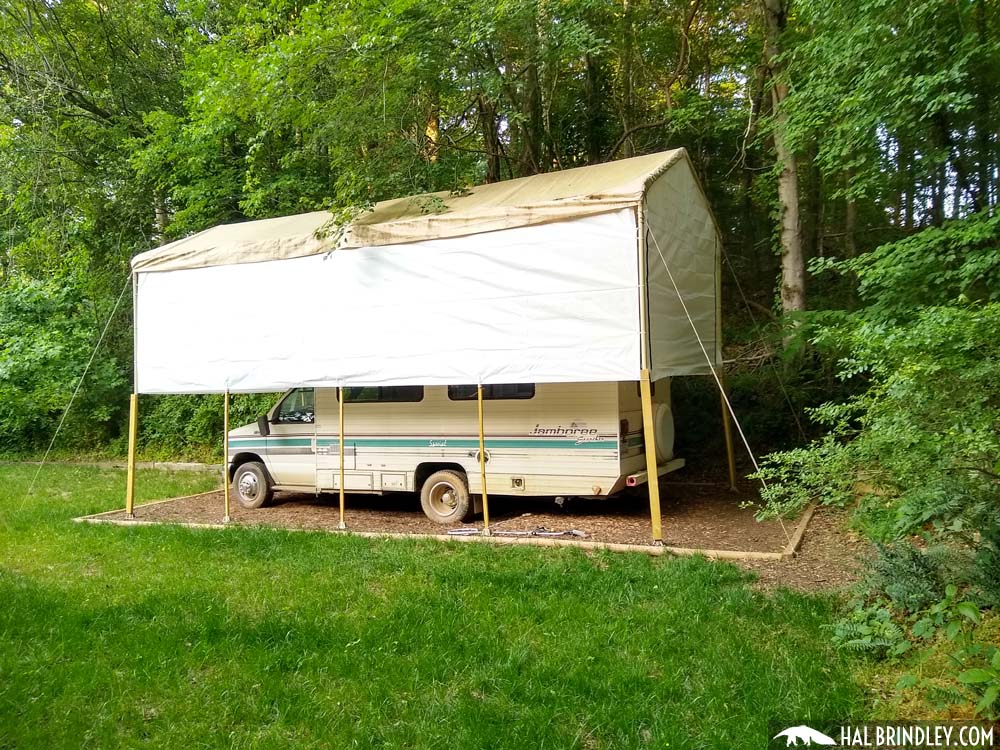
You’ll notice the sidewalls are white while my original canopy is tan. I ordered the tan canopy because I got it cheaper at Northern Tool. But I can’t find a tan enclosure kit! Oh well! Now that I’m ready for the rain and have exposed the old roof decking, it’s time to make some decisions.
How is an RV Roof Built?
First of all, a recap of my findings from the last post. Here is my illustration of how the original RV roof is built in my 93 Fleetwood Jamboree motorhome.
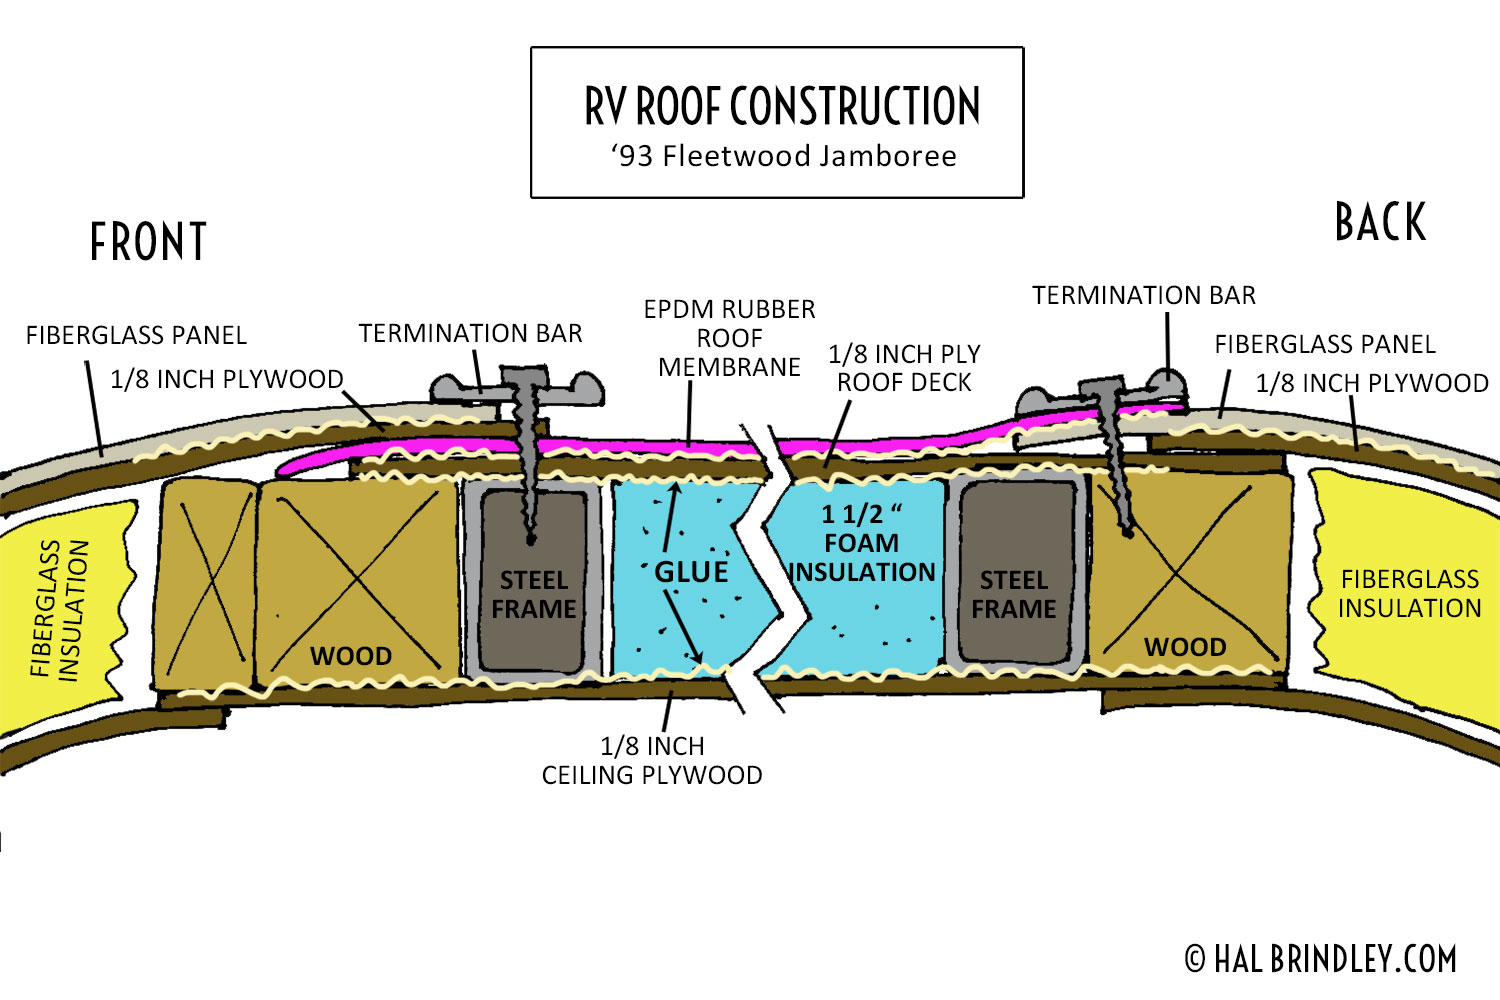
I’ve colored the EPDM rubber roof membrane pink so you can see it well. It’s important to note that it overlaps the fiberglass panel at the back end of the RV and it is laid under the fiberglass cover panel (and 1/8″ ply) at the front of the RV. This keeps water flowing off backwards while driving, instead of having the tendency to blow under any seams. But the most important finding was that the structural strength of the roof depends on the glue between the foam insulation and the roof ply above and the ceiling ply below. This creates a lamination effect (like glue between layers of plywood) that creates a single rigid structure. It is surprisingly strong considering how thin the plywood is on both sides! Before I started taking apart the roof I could jump around on it and feel no flex. But as soon as I started peeling up the top layer of 1/8″ luan plywood, the roof got floppy.
This means that in order to maintain a strong and lightweight roof, any repair needs to maintain a continuous lamination (glue) between the foam insulation and the roof/ceiling plywood.
Maybe your RV is made with wooden 2×4 roof framing rafters and has thicker plywood decking on top. Then it is probably insulated with fiberglass batting and doesn’t depend on a lamination effect for strength. If so, I envy you. I think that would make this process a lot simpler.
RV Renovation Decisions: What Should I Fix & In What Order?
Now that I can see how the roof of the RV is built and the extent of the water damage, I have some important decisions to make about how to proceed with my RV renovation. How much do I want to fix/replace and in what sequence? It’s time to make a game plan for my RV remodel! I know I have water damage in the following areas:
- roof decking plywood
- ceiling inside RV
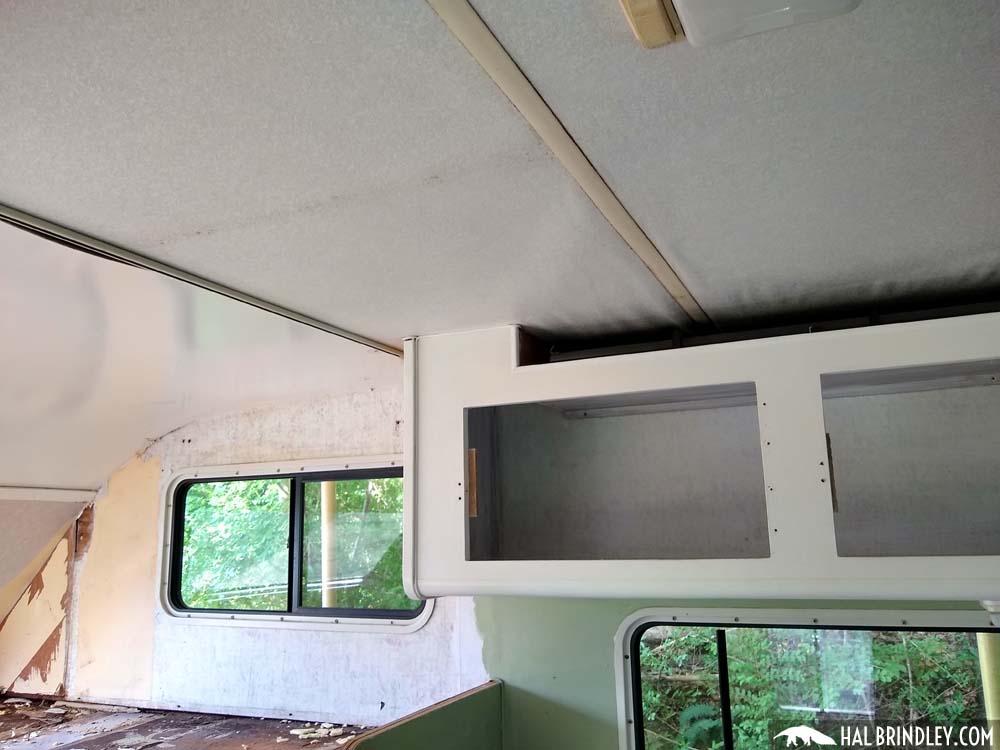
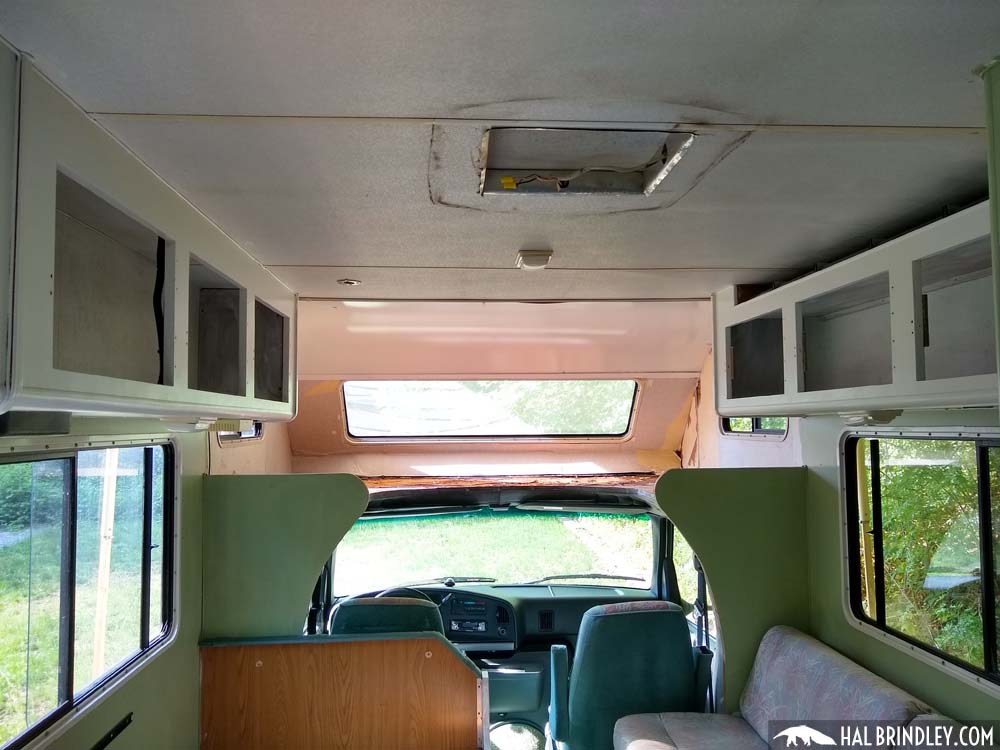
- cabover bunk (the bed area over the cab)
- ceiling and roofing in rear rounded transition of roof (over bathroom & closet)
- some framing in sidewalls next to roof
Then I have to consider my goals and try to balance them all. This is the hard part because many of them work against each other.
Balancing Goals for RV Repair
- lightweight yet strong & durable
- attractive yet functional
- highest quality yet as cheap & least amount of work possible
And finally, I have to figure out the smartest sequence, so I don’t repair something and then have to undo it later for the next repair. Remodeling projects are like a game of chess; you have to anticipate ten moves ahead to keep from screwing yourself along the way. For example, wiring that runs through the ceiling was installed from above during manufacturing, before putting on the roof decking. I can tell because the grooves cut into the styrofoam for wiring are at the top of the foam and would have been impossible if the roof was already on. So if I replace the roof first and then want to change some wiring in the ceiling later, how would I get to it? (I would probably end up putting ugly surface-mounted wiring tracks in.)
Another sequence issue is whether to do the cabover bunk repair first or the roof repair? I can see that the curved fiberglass panel at the top of the over head bunk area overlaps the roof decking and the rubber roofing. So I should probably proceed with roof decking first and then do the overcab bunk repair.
My last sequence problem is whether to repair the ceiling inside first, or the roofing deck outside first. And here’s where things get tricky because I can’t replace all the ceiling ply without removing the cabinets (and possibly interior walls.) That’s because the ceiling luan plywood was installed first and then the interior walls were built and glued to it, as well as the cabinets (also glued to it.)
Considering Options For Repairing Water Damaged Ceiling & Roof in RV Remodel
- TAKE EVERYTHING APART & REPLACE ALL. This one sounds like a crazy option to me and way more work than necessary, but it is still an option, especially if the water damage in your RV is more extensive than mine. This would require taking out the cabinets, and possibly taking out interior walls (like the bathroom wall and closet walls) but leaving all the metal roof framing in place.Then you could attach full sheets of 1/8″ luan plywood to the underside of the entire roof structure, glue it securely to the foam insulation panels, and then replace all the 1/8″ plywood on top of the roof, making sure to glue all of it carefully to the foam insulation. Then place new layer of EPDM rubber roof on top.
PROS: This would most closely re-create the original quality of the manufacture, would be the lightest possible repair and the strongest roof lamination.
CONS: A huge amount of work, disassembling cabinets and interior walls, as well as a lot of removing wiring and fixtures. It may be impossible to disassemble cabinets that have been glued together without damaging them. Then you might end up building cabinets from scratch. Most expensive option. - PUT A COSMETIC LAYER OVER CEILING, SECOND LAYER OF ROOF PLY. This would be the easiest option, just cut pieces of thin paneling to cover the entire ceiling (without removing cabinets or walls). Then lay a second layer luan plywood over the old roof substrate to cover up damaged areas. Then install new layer of EPDM rubber roof.
PROS: Cheapest, easiest, fastest. Will look just as nice inside as actually replacing all the ceiling ply
CONS: Heavier because includes multiple layers of ceiling paneling and roof paneling. Less strength because there will still be some delaminated areas of ceiling and roof decking. Worst of all, I’d be trapping in rotten wood in the ceiling that may be growing mold. - HYBRID OF ABOVE 2 OPTIONS. I think somewhere between these two extremes might be my best option. I could replace all the 1/8″ roof paneling with full sheets and glue it as well as possible for a full strength roof, followed by new EPDM roof. Then for the interior ceiling I would carefully cut out sections of the ceiling plywood that had water damage and came unglued from the foam insulation, and replace them with carefully matched pieces of the same thickness 1/8″ luan plywood, and glue them to the foam as best I can. Most of the ceiling is still well-glued so hopefully I wouldn’t have to replace much. Then, because there would be a functional but crappy-looking hodgepodge of ceiling paneling in place, I would put a thin cosmetic layer of paneling over the ceiling between the cabinets in the living area. I could choose an attractive aged-wood or bead-board paneling that would look cute. I could either glue it up to increase lamination strength, or use removable fasteners in case I want to put wiring or fixtures inside the ceiling later.
My RV Restoration Plan
Time to come up with a work sequence so I can stay on target and keep moving. Here’s my RV renovation plan.
- Remove all roof plywood
- Repair or replace any damaged framing members around roof
- Install new roof plywood, gluing to foam
- Remove fiberglass cover panel at rear transition of roof
- Replace damaged plywood beneath
- Reinstall rear fiberglass panel & corner trim
- Install EPDM rubber roof (glue down)
- Install side termination bars and back termination bar on EPDM
- Reinstall roof fixtures (vent covers and caps)
- Strip interior surfaces of cabover bunk area, determine damage
- Disassemble cabover & replace damaged wood
- Reassemble fiberglass panels outside cabover bunk
- Install front termination bar on roof
- Carefully cut out damaged sections of ceiling plywood
- Replaced damaged ceiling sections and glue to foam
- Install cosmetic ceiling cover (layer of attractive paneling to hide patchwork)
- Install new paneling inside cabover bunk.
The steps for repairing the overhead bunk area will probably get shuffled around and refined as I determine the extent of damage there. But at least this will get me going. OK, let’s get back to it! Next I’m going to remove the damaged wood from the roof.