Camper Roof Repair – Step 1
Welcome to my RV Renovation Series! So you want an RV but can’t afford one. If you’re like me and have more time than money, then perhaps your best option is to buy an old RV and fix it up. If you happen to find a really good deal, then chances are it has water damage. All old RV’s do! Time to consider an RV roof repair!
I know, an RV roof replacement can seem like an impossibly difficult task. I get it. I bought my RV over a year ago and didn’t have the guts to start tackling this task until today. But I’m here to tell you, if I can do it, you can do it. Can I actually do it? Stay tuned and find out!
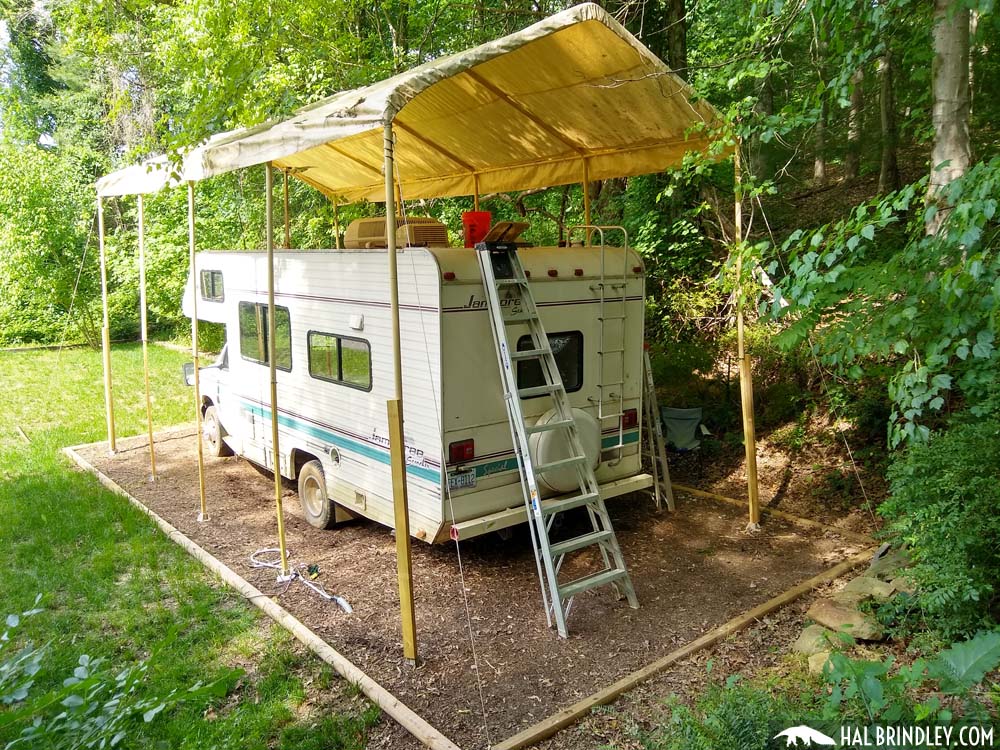
I bought this 1993 Jamboree for $5000. It has only 55,000 miles and all the appliances work and I love the layout. The catch? Water damage! I’ve never worked on an RV before and I have to admit, I’m scared. I’ve done a lot of house remodeling and I’m still scared. That’s because this is all new to me and I have no idea what to expect. Hopefully if you’re considering doing this yourself, following along on my RV roof replacement project will give you the courage to dive in!
Steps Covered Today:
- Set up an RV Carport for shelter
- Examine the Old Roofing
- Remove EPDM Rubber Roofing
- Removing Plumbing Pipe Vent Cap
- Removing an RV Roof Vent Fan and RV Vent Covers
- Removing a Vent Cover for an RV Refrigerator
Tools I Used Today:
- Utility knife
- Stiff scraper
- Vise grip pliers
- Screwdriver
- Wire cutters
- Ratchet screwdriver set
- Socket wrench set
- Drill bit set
- Cordless drill
- Cordless reciprocating saw
- 10-foot stepladder

Set Up an RV Carport For Shelter
So my first step (that I actually did many months ago when I bought the camper) was making a shelter so I could work without rain pouring in. I bought a 12 x 26 SuperMax Canopy by ShelterLogic (over $450 on Amazon but I bought mine from Northern Tool for about $340!) and jacked up the legs with wood extensions to make the canopy high enough that I could stand on the roof and walk beneath it. That seemed to be my cheapest option. It seems like there are no canopies available that are tall enough to function as an RV carport. You could buy an actual metal roof RV carport but those are way more expensive, generally $2000 and up! Also these don’t usually have enough clearance above for you to work on the roof. Or you could build a wood framed shed roof and strap a tarp to it . I calculated the cost of doing it that way (wood framing) and it came out to a similar price as buying this canopy. I figured I would rather have it semi-portable so I went with the canopy, plus this allows me to adjust the height up and down when I need to. Of course the cheapest option of all would be to just throw a good tarp over the top of your RV for rainy days and only work on sunny days!
Originally I raised the legs with 1 1/2″ PVC pipe that fit inside the legs and then I attached a hose clamp around the PVC pipe to hold up the canopy legs. Eventually those bent during a wind storm. Then I sawed 1 1/4″ square legs from 2×4’s to put inside the canopy legs (again holding the canopy up with pipe clamps.) and reinforcing the four corners with an additional 2×4 screwed to it. This is still a little floppy. I probably should have forked out for some rigid steel pipe from the start. Perhaps electrical conduit pipe? At any rate, it is holding. Just be sure to stake the corners down with rope if you have any wind!
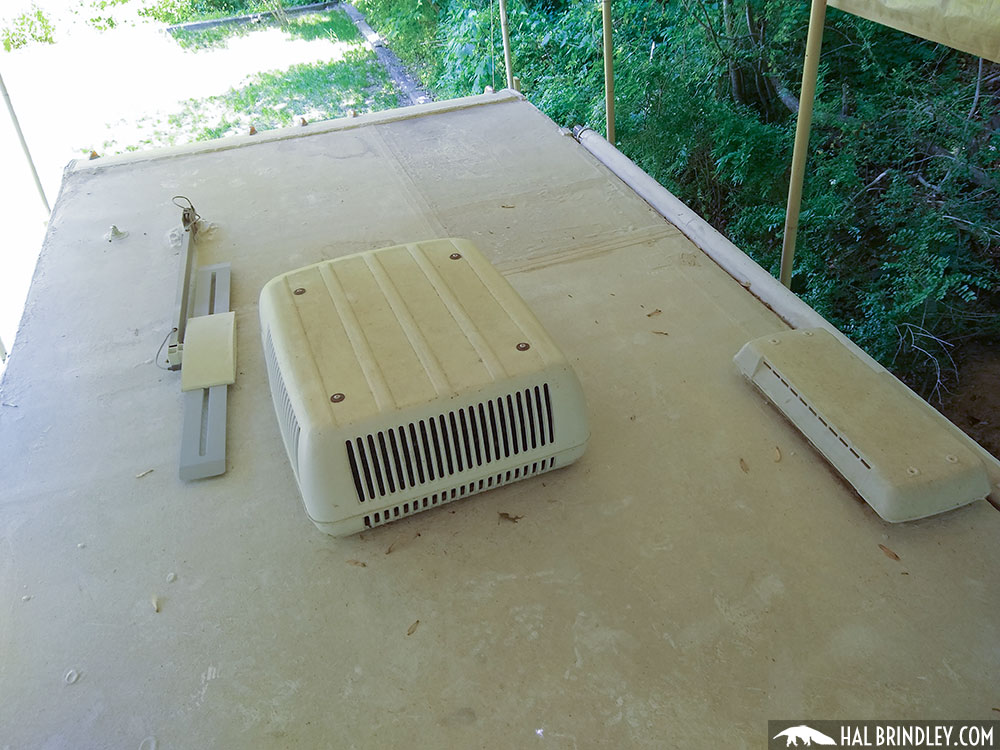
Examine the old RV Roofing
Time to climb up and take a look at some of the problem areas on my old EPDM roof. EPDM is the most common kind of rubber roofing found on campers.


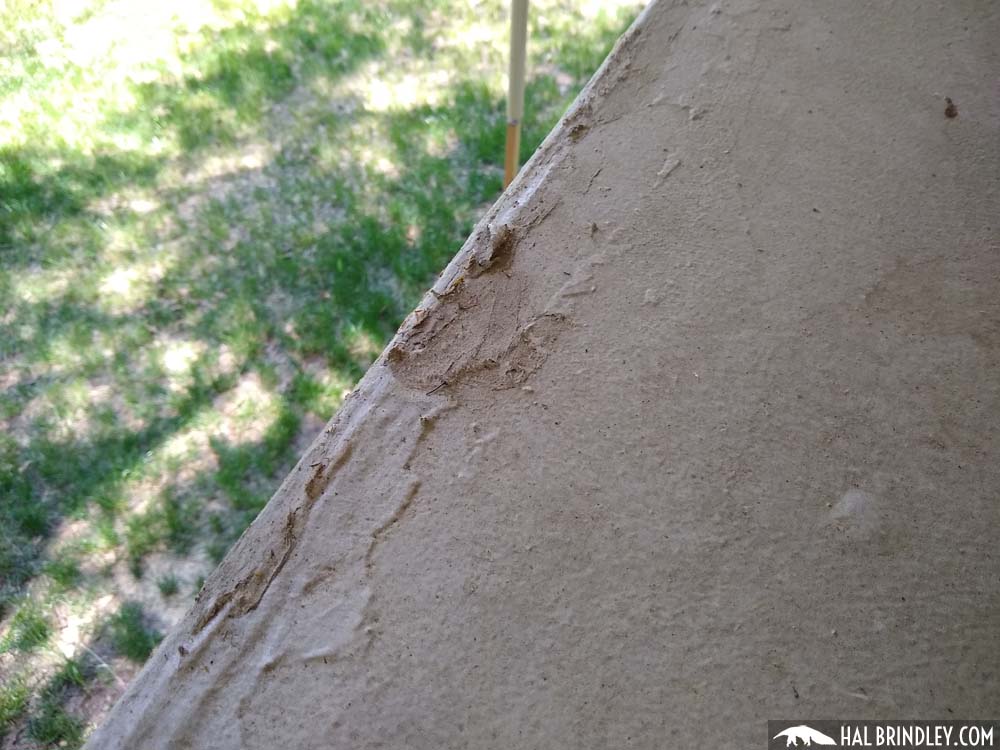

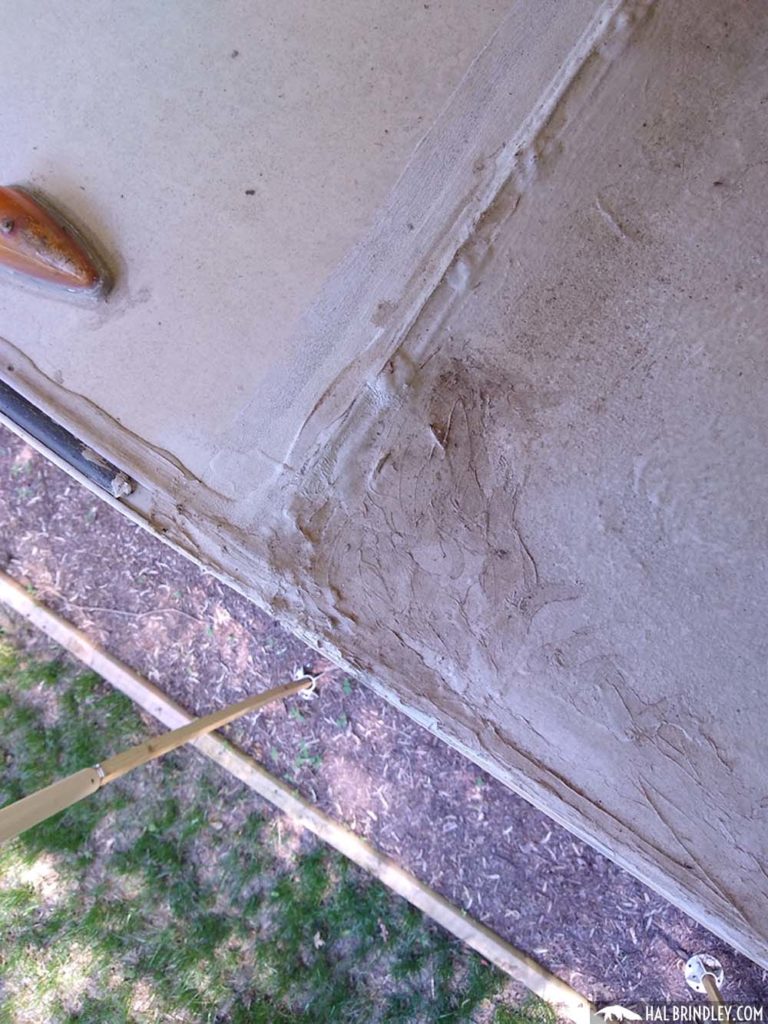
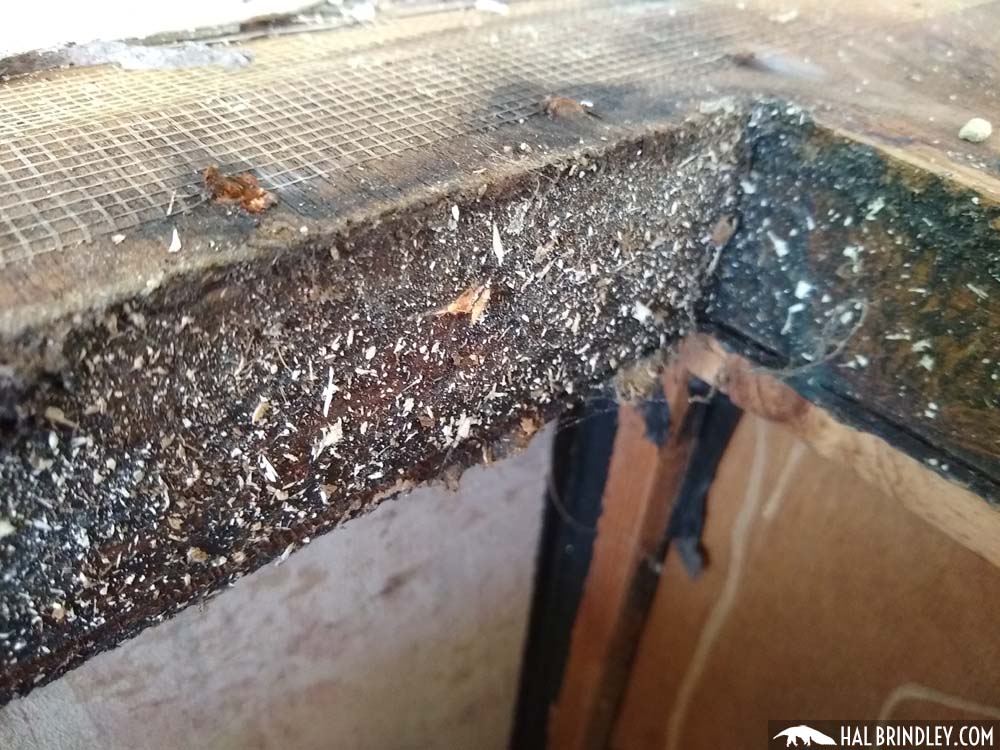
As you can see, this roof has had a lot of issues over the years. Looking from the inside of the camper there have clearly been leaks in many areas of the roof. Time to hold my breath and dive in. I grabbed a utility knife and started slicing.
Remove RV Roof Coating (if any) and EPDM Rubber Roofing
The first thing I noticed is that there were two layers. On the bottom is the original EPDM rubber roof layer. I know it’s EPDM rubber and not TPO rubber because of the black backing. (TPO roofing is white on both sides.) On top of my EPDM roof is a thin RV roof coating that was applied later. RV roof coatings are basically a liquid that is painted on top of existing roofs that creates a new rubbery layer for waterproofing. I just left the roof coating stuck to the EPDM roofing and pulled them up together. (You don’t need to peel them up separately.)
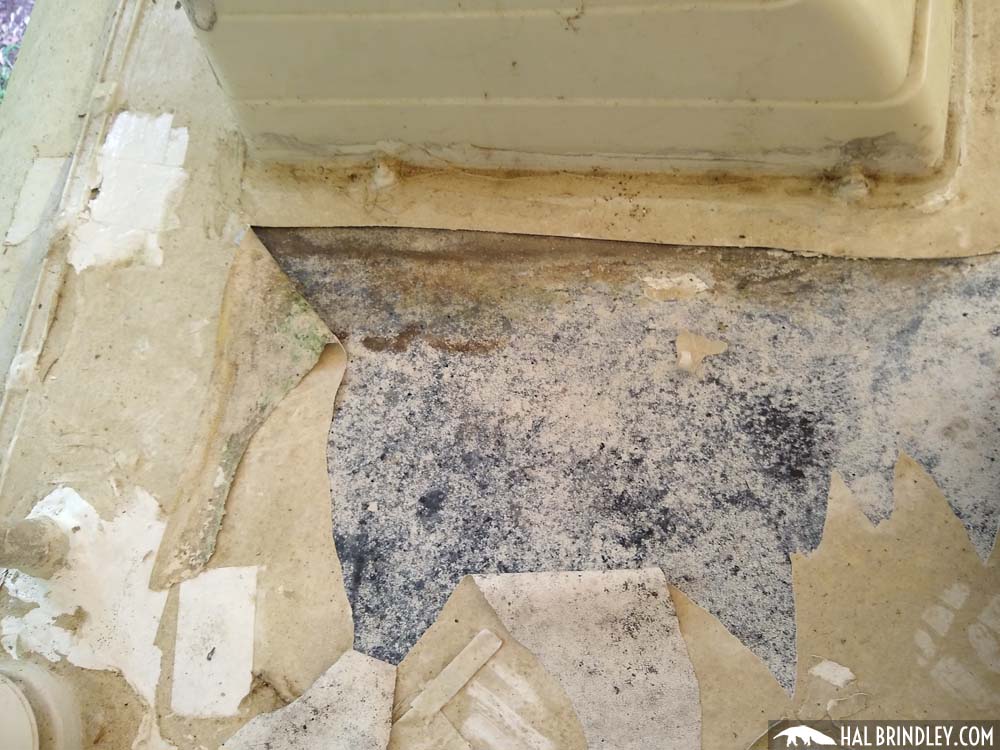
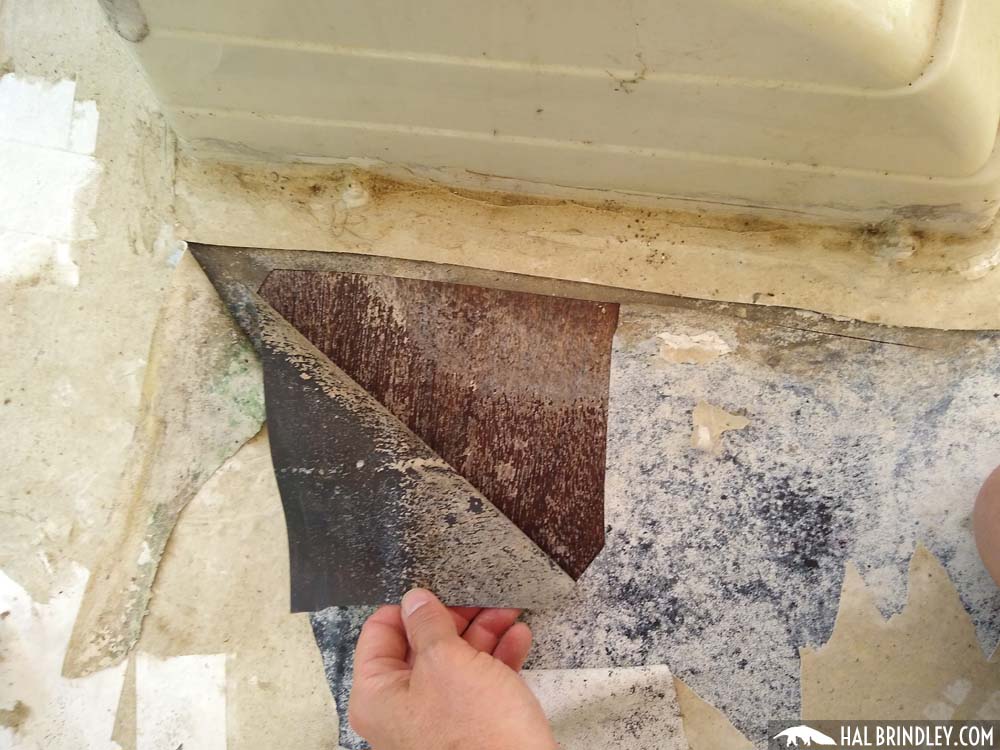
This step went pretty quickly. There was an adhesive under the bottom layer of rubber that was still pretty well stuck in many places, but with a good bit of force it peeled up cleanly. I just used a utility knife to cut it into sections and pulled it up bit by bit, tracing around the various fixtures attached to the roof. Now I could see all the damaged plywood roof decking beneath.
HEADS UP! You may not want to peel off the rubber first! I chose to peel off the rubber before removing fixtures just so I could see what I was dealing with. But I have to warn you, the old adhesive was still sticky, and a pain to walk on. And whenever I knelt on it I felt like it was tearing the hair off my kneecaps! Another drawback is that once I started removing the fixtures, lots of little chunks of caulk and roof sealant were sticking to the adhesive. If you think you’ll be saving the roof decking plywood (not replacing it), then you might save yourself some cleanup trouble by removing the fixtures first and then peeling up the rubber!

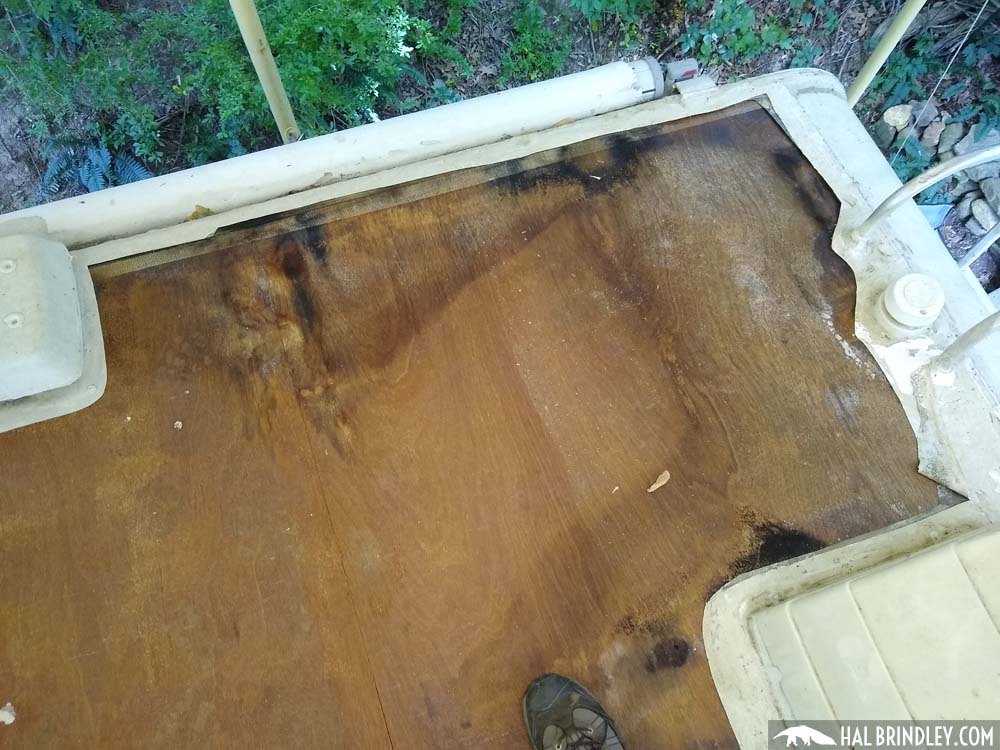
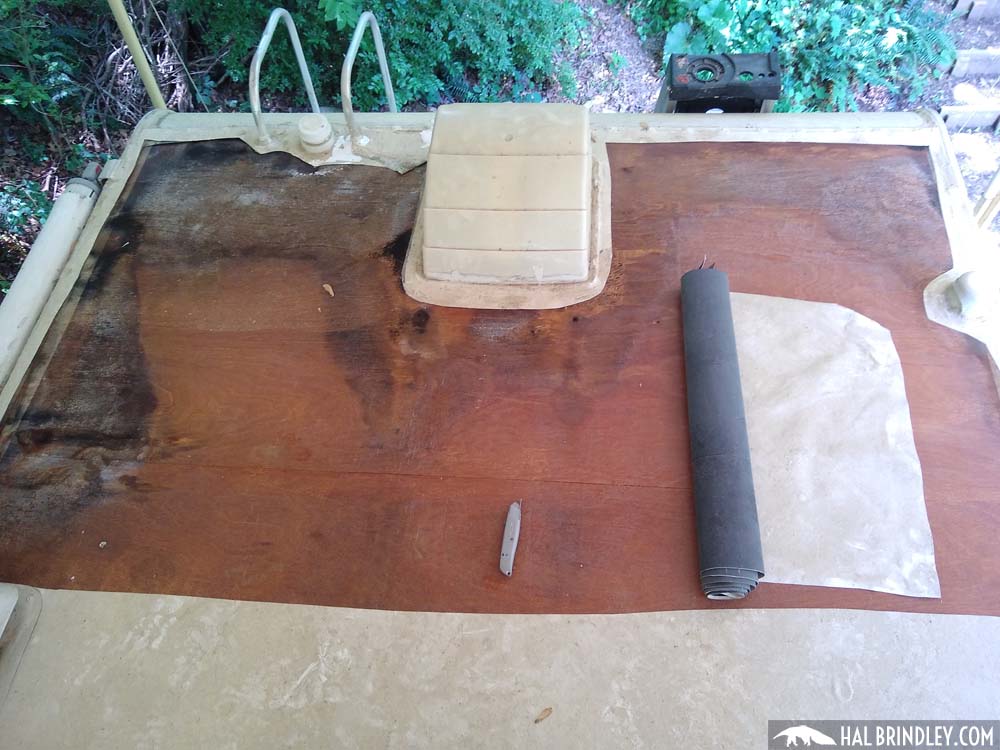
There was nothing really horrible that made me feel like I was going to fall through, but definitely a lot of damage and I was getting the feeling I would be replacing a lot of the roof decking plywood.
Removing a Plumbing Vent Cap From RV Roof
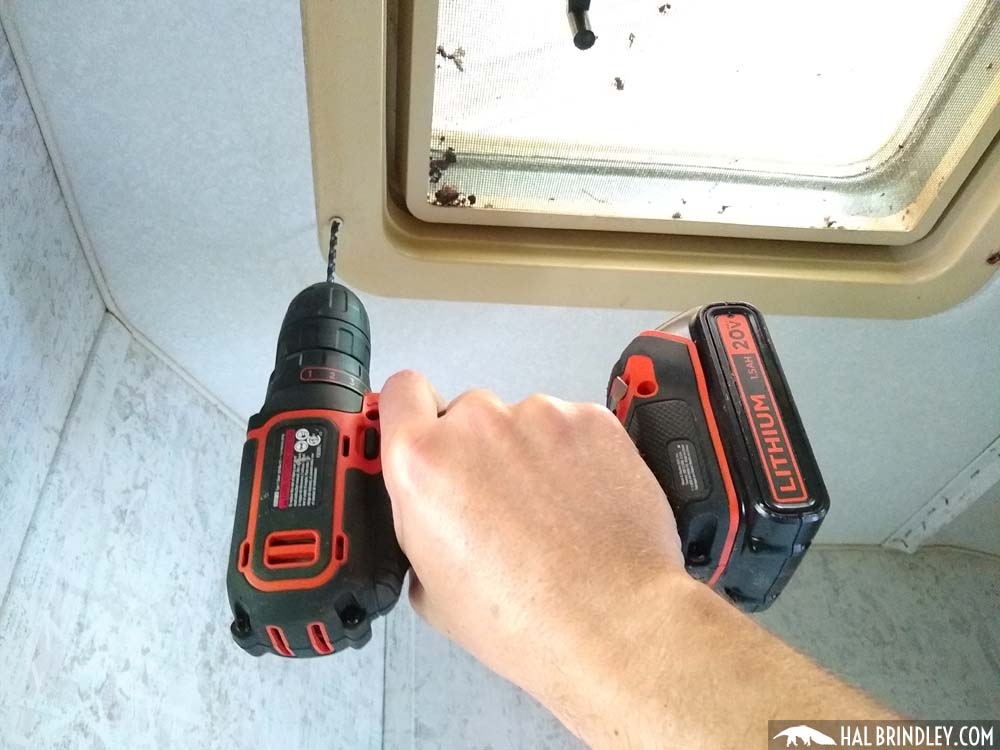
So next I started working on removing the roof fixtures one by one. I went for the simplest one first, a vent cap from a kitchen sink plumbing vent pipe.
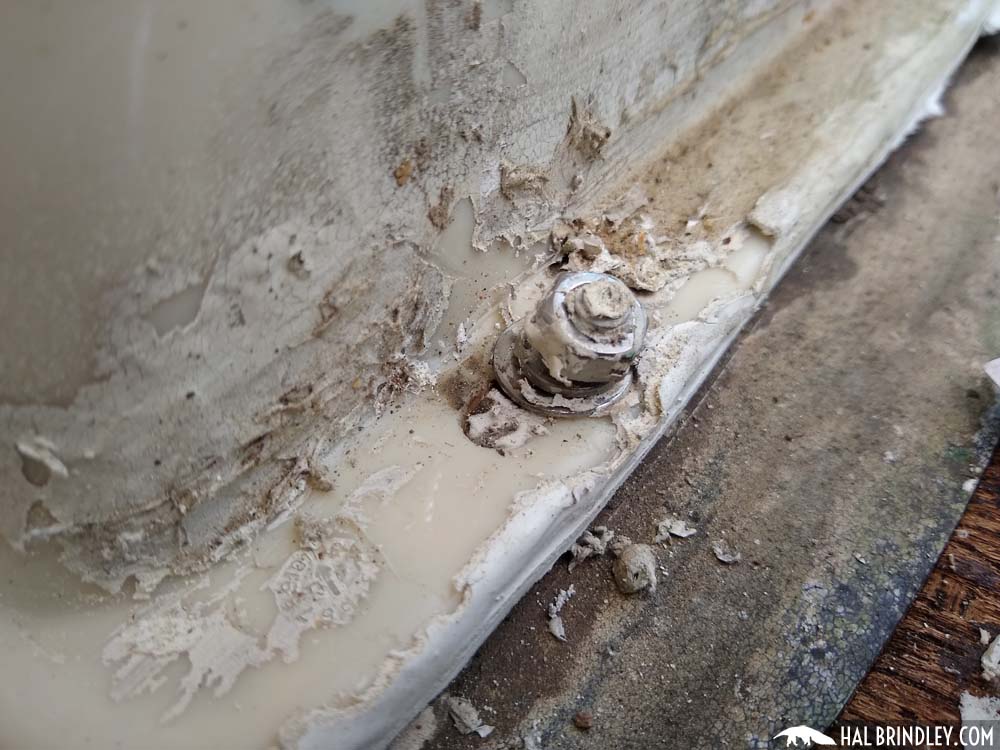
I used a stiff scraper with a chisel-like blade and just started prying and chipping and scraping and hacking. There is no other way around this, you just have to start digging until you expose the screw heads.
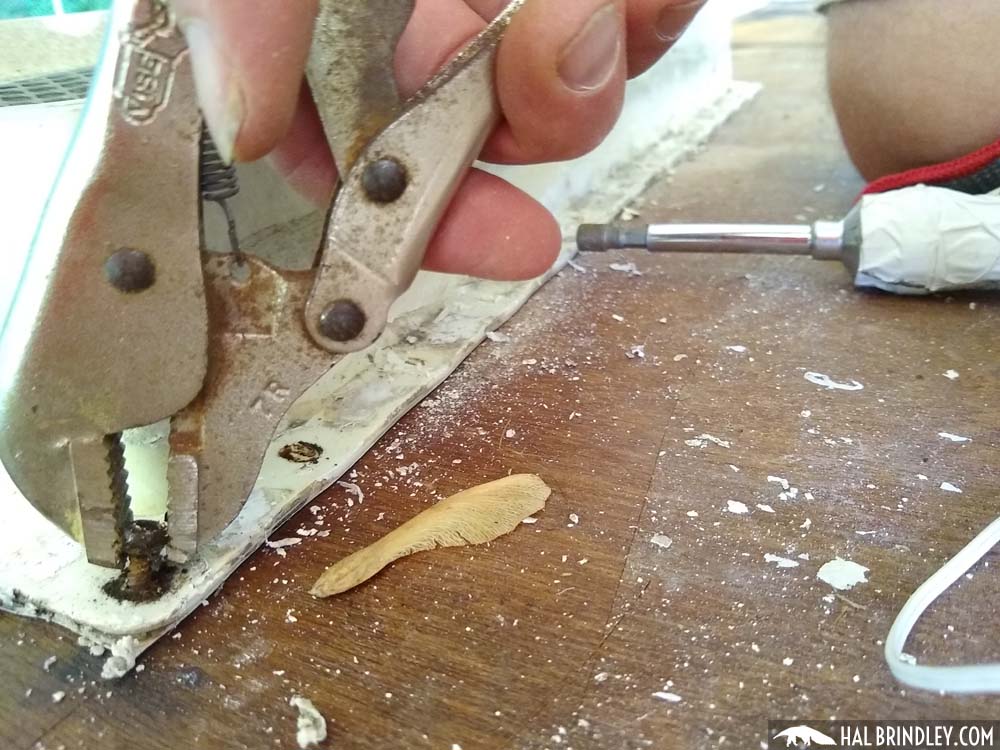
The screws on this vent cap were hex-head metal screws so I used a small socket driver to remove them. Some came out clean. Others were rusted and I had to use a vice-grip pliers to grab the heads and turn them little by little. Then I removed the top piece of the vent cap assembly.
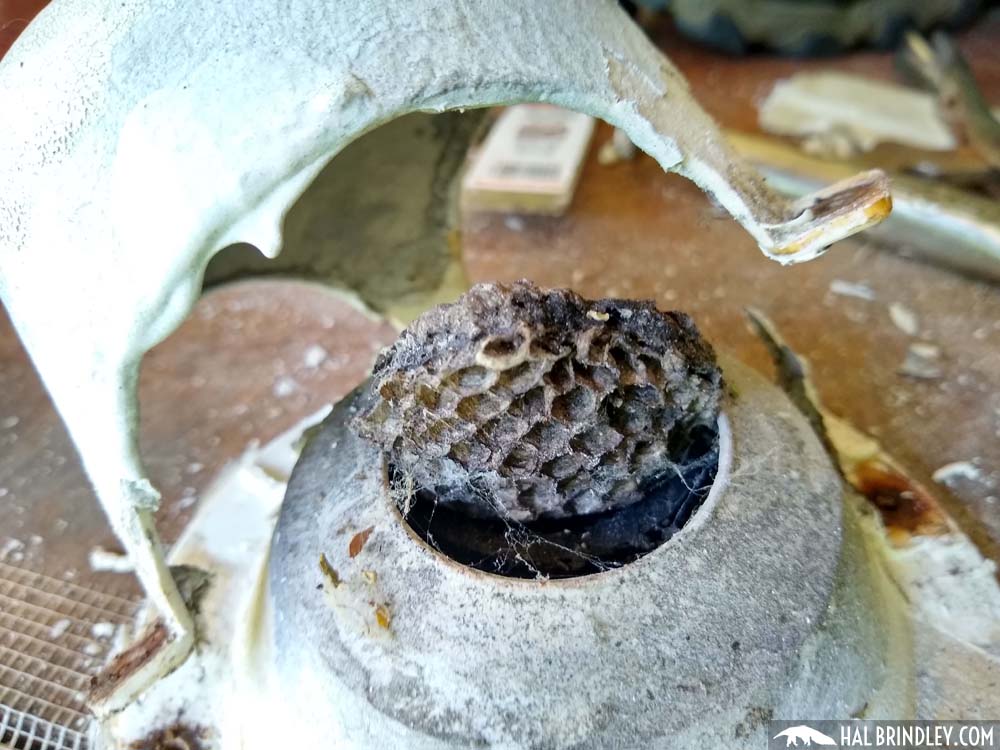
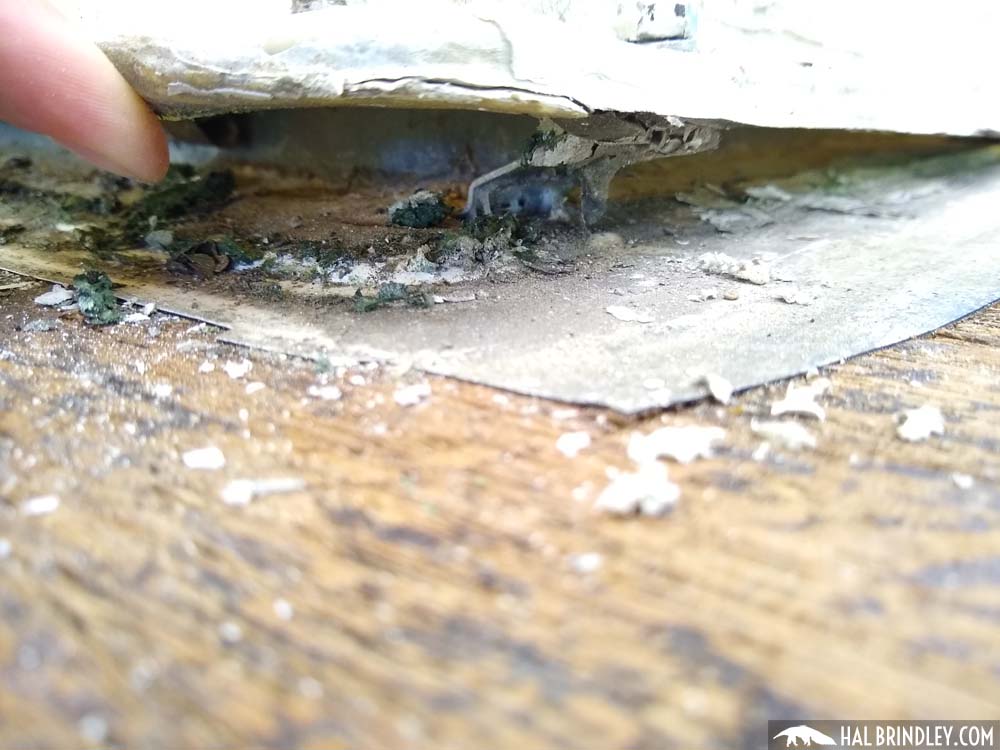
This is a sight I’ll probably have to get used to, finding the remains of animal habitation in every nook and cranny. I spend an awful lot of my time creating good wildlife habitat in my yard so I don’t get offended when a creature chooses to set up home in my RV. But when it’s going to mess up the functionality of the RV then I try to take some steps to prevent it, without having to kill anyone. Luckily nobody was home in this old nest so I just tossed it. Perhaps I’ll put a screen over it when replacing it.
Which brings us to the next point. You should try not to damage these pieces (like vent covers and caps) as you’re scraping off the old caulk and sealant just in case you need to use them again. I figure I’ll replace cheap pieces like this cracked and worn out vent cap, but other more specialized pieces might be harder to replace. (Guess I’ll find out when the roof is done!)

So I pried up the rest of the cap and scraped up the remaining rubber roof and butyl tape and putty and 25 years of other gunk and here’s how it looks cleaned up.
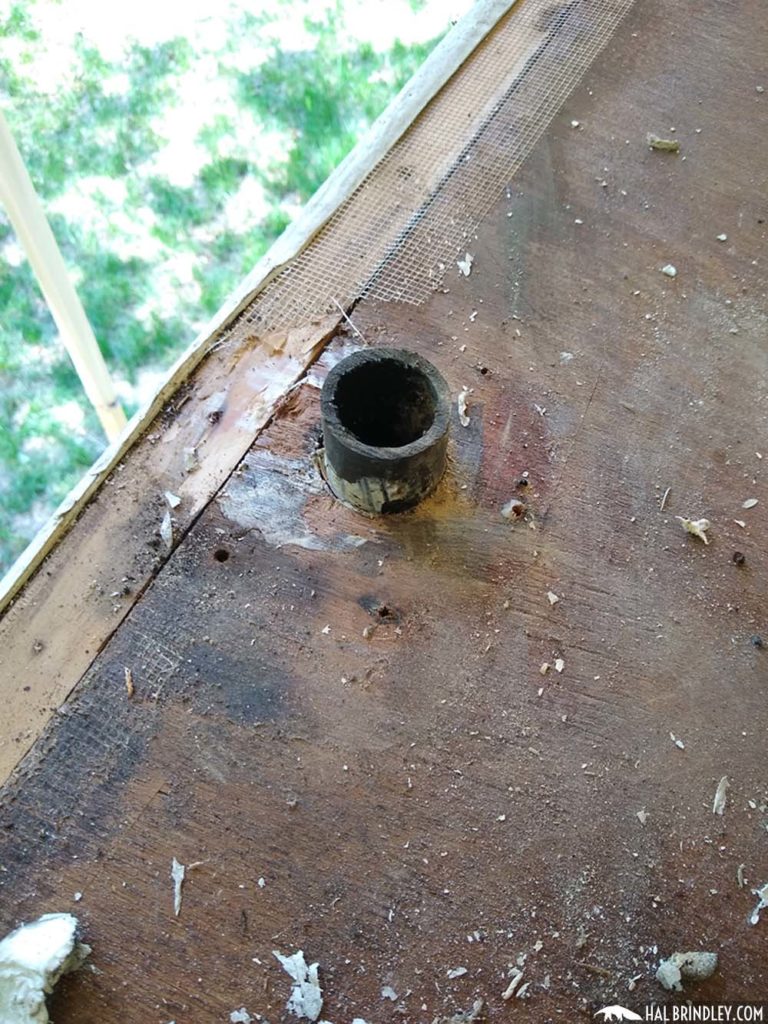
One down, 7 more fixtures to go.
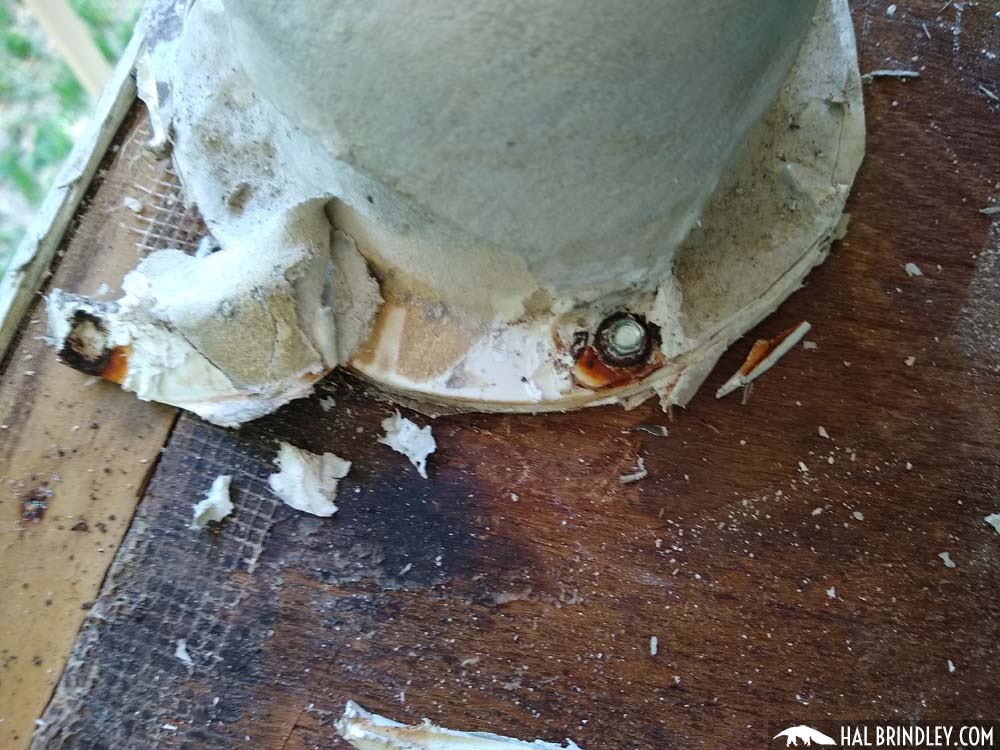
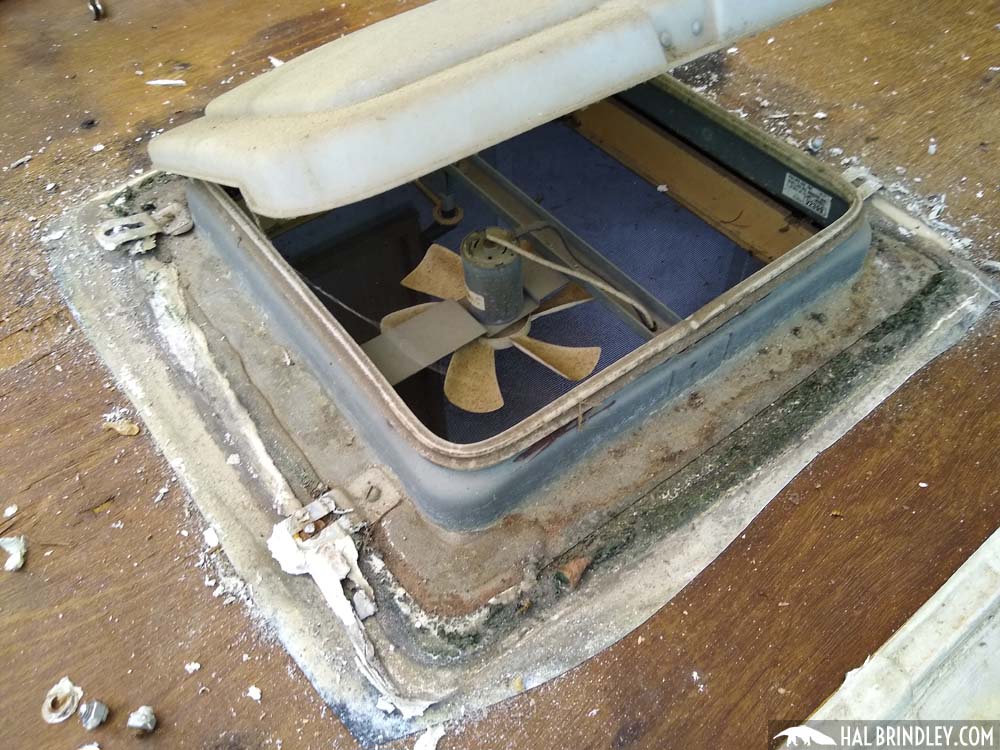
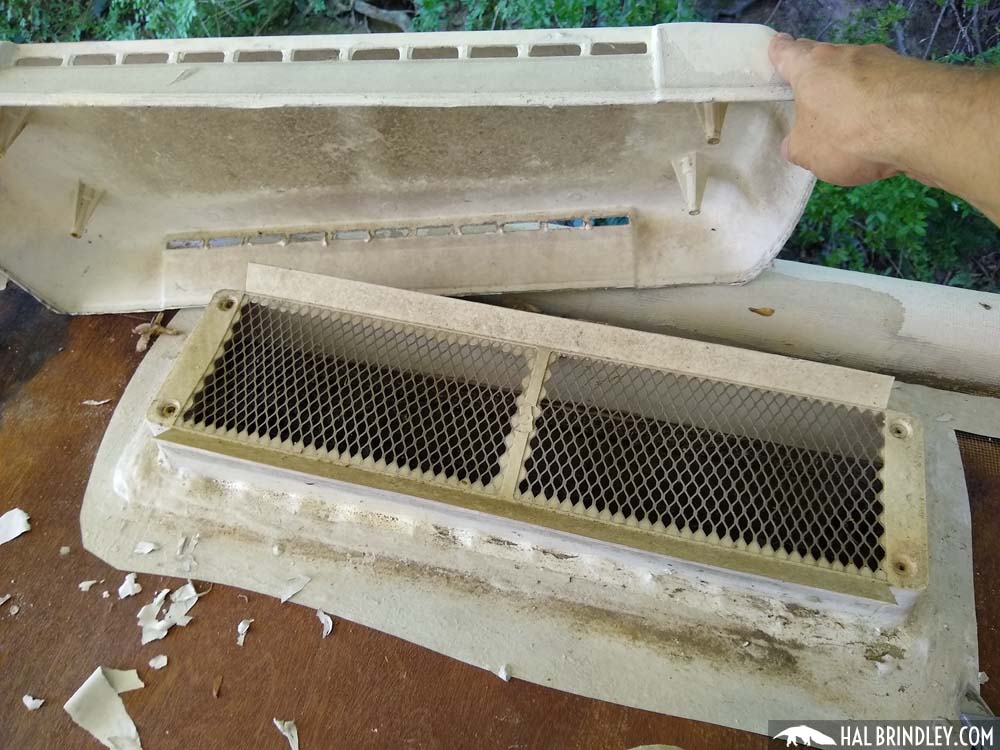
Removing RV Vent Covers and RV Roof Vent Fan
Next I decided to tackle the only roof ventilation fan that my camper has. My roof vent also had a vent cover over it. So I started scraping the gunk from those screws.
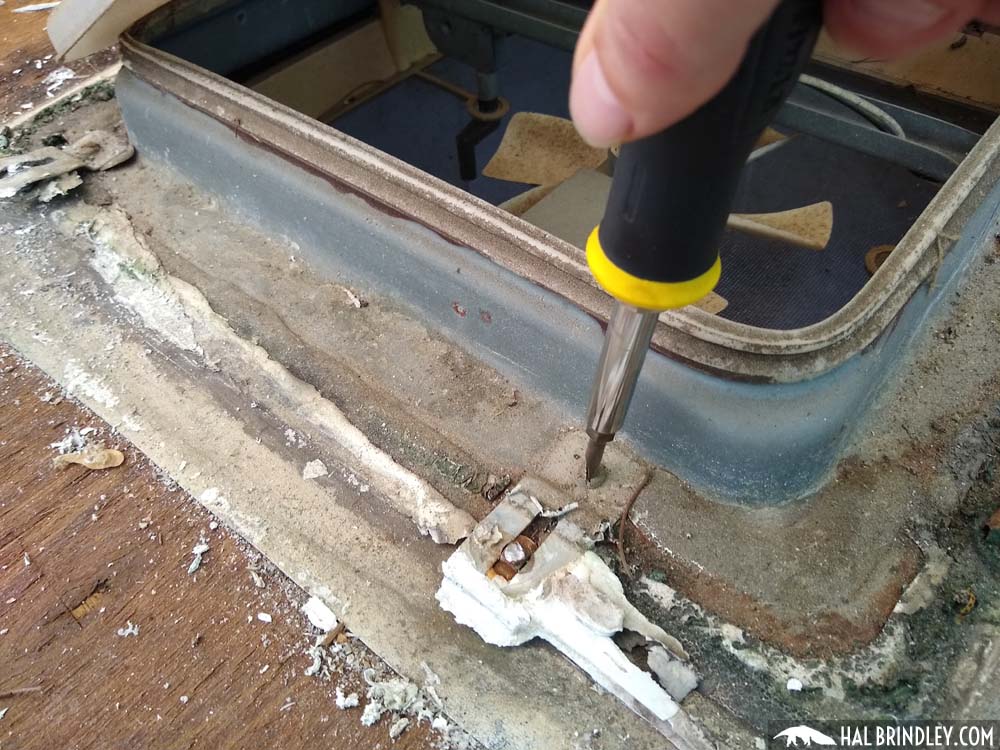
The fasteners on this RV roof vent cover were nuts on small bolts. The first one came off fine with an extension socket kit. The second one just started spinning, meaning the bolt was not fixed in place but turning along with the nut. Bummer.
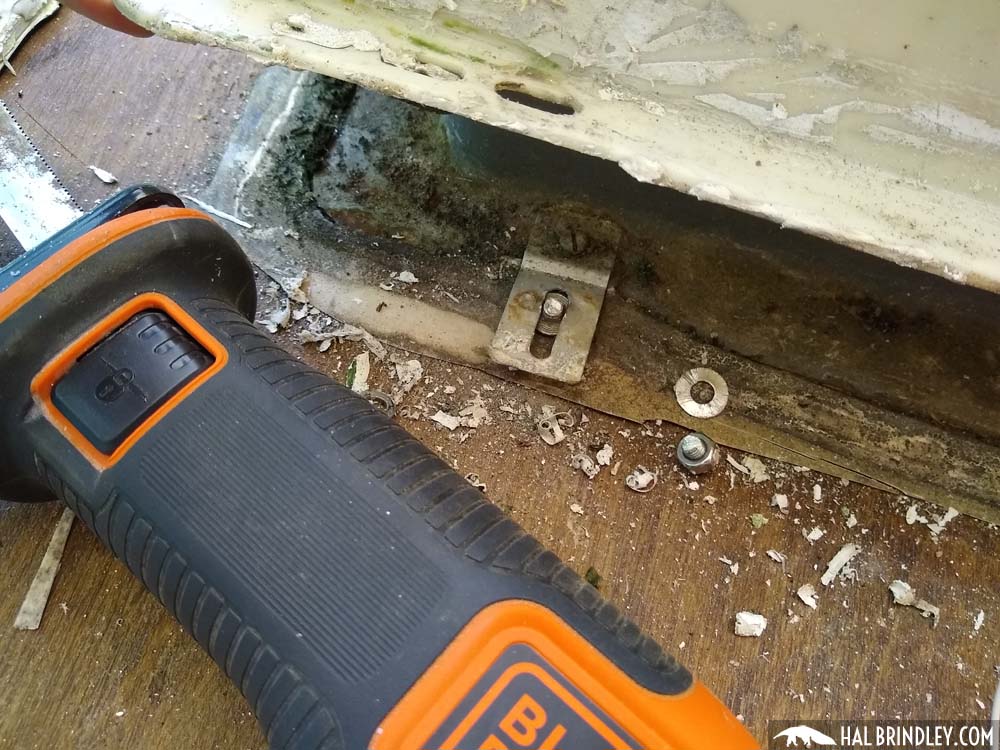
There was a bracket holding the cover down, one end screwed flat to the deck the other end was raised with a bolt going through into the cover. I didn’t have any good way to hold the bolt in place so instead I opted to saw through the bolts with a reciprocating saw.
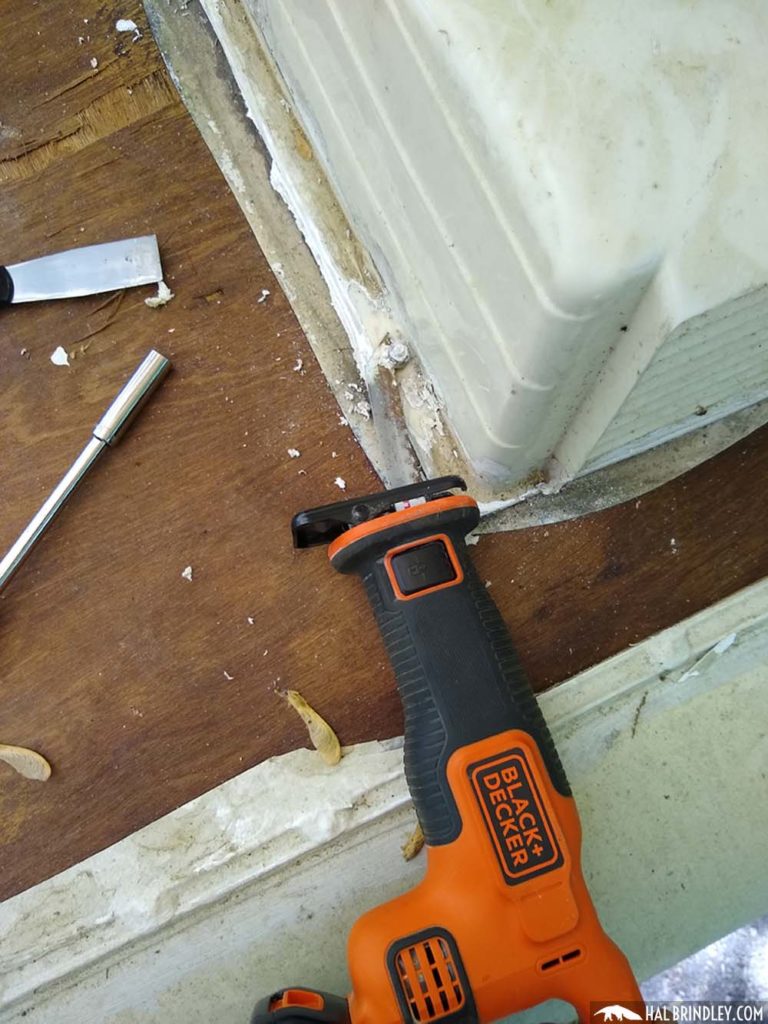
I used a cordless reciprocating saw with a metal-cutting blade but it was tricky to get the blade flat enough to reach the bolts so close to the roof deck. I bent the blade a bit to make it easier to reach and then the job went more smoothly.

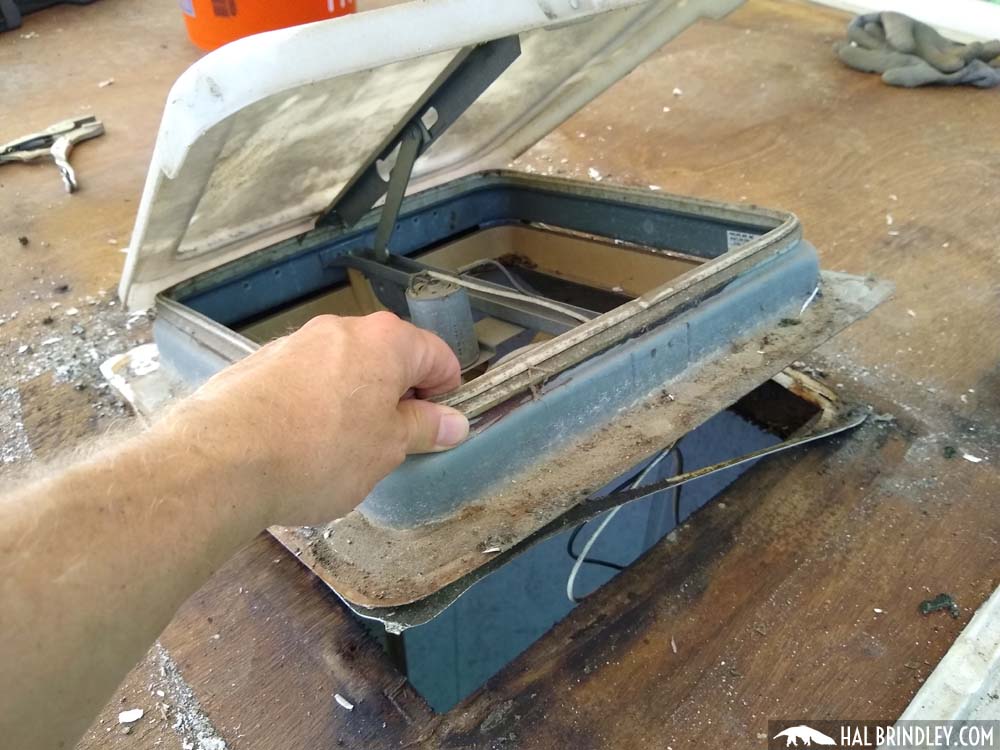
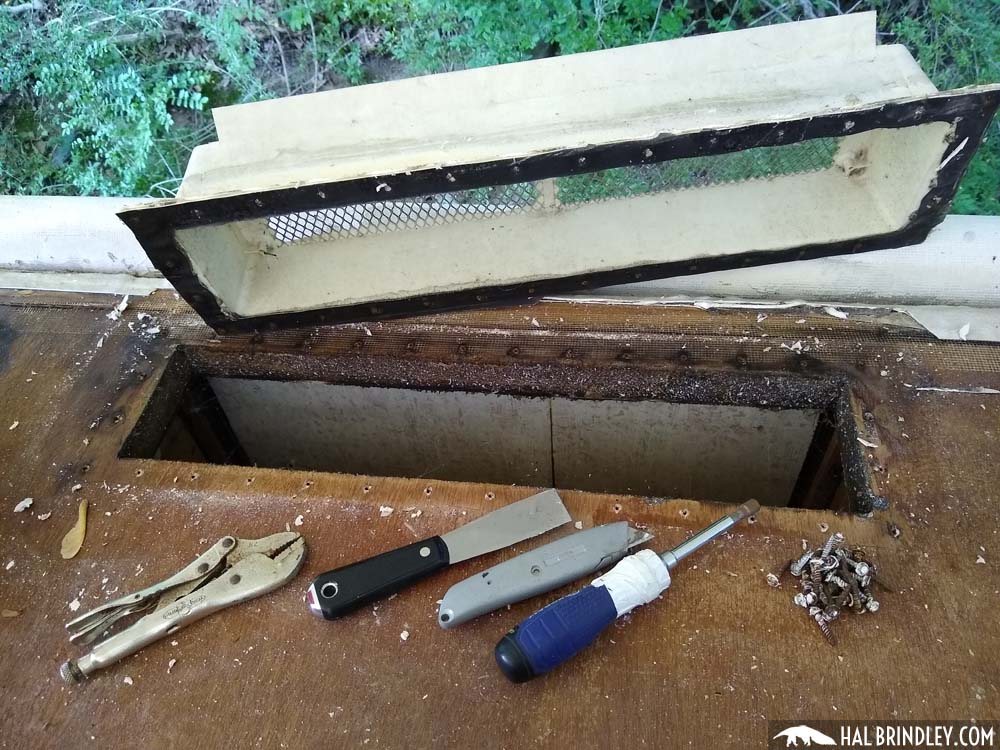
Once I had sawn through the remaining three bolts, I pried up the cover.
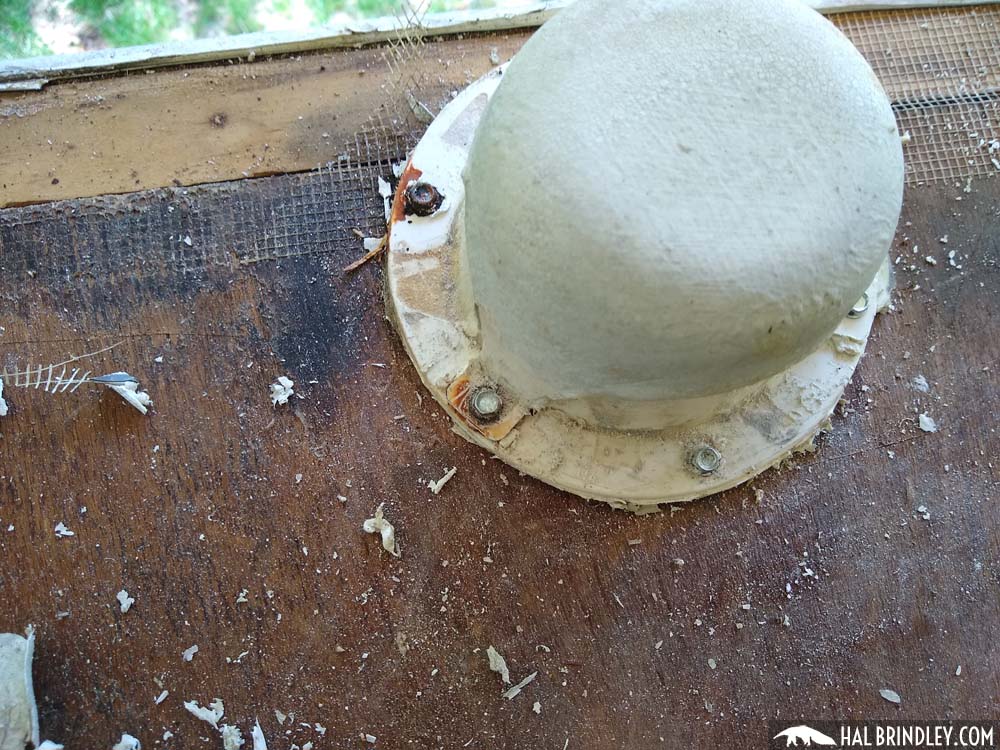
Then I unscrewed the brackets from the flange of the vent fan itself. These were flat head screws. Most were so old and rusted that they sheared off when I unscrewed then with a lot of force.
Then I scraped more caulk and roof sealant off the flange of the roof vent itself. I soon discovered there were no more screws or hardware holding it down so I gave up on the scraping and went inside the RV

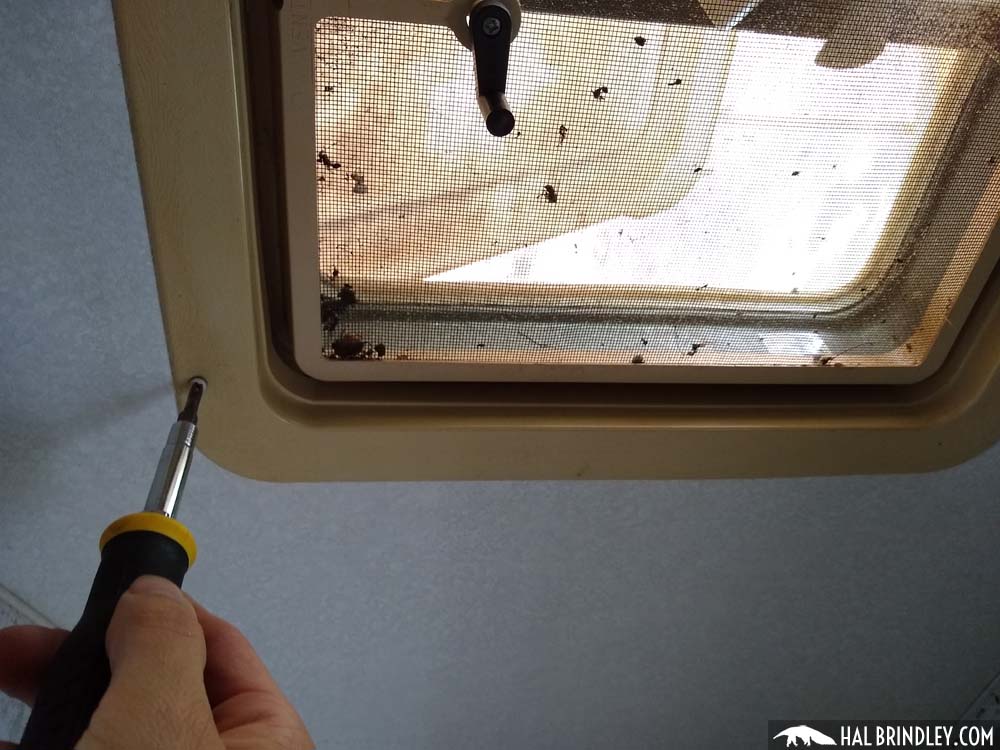
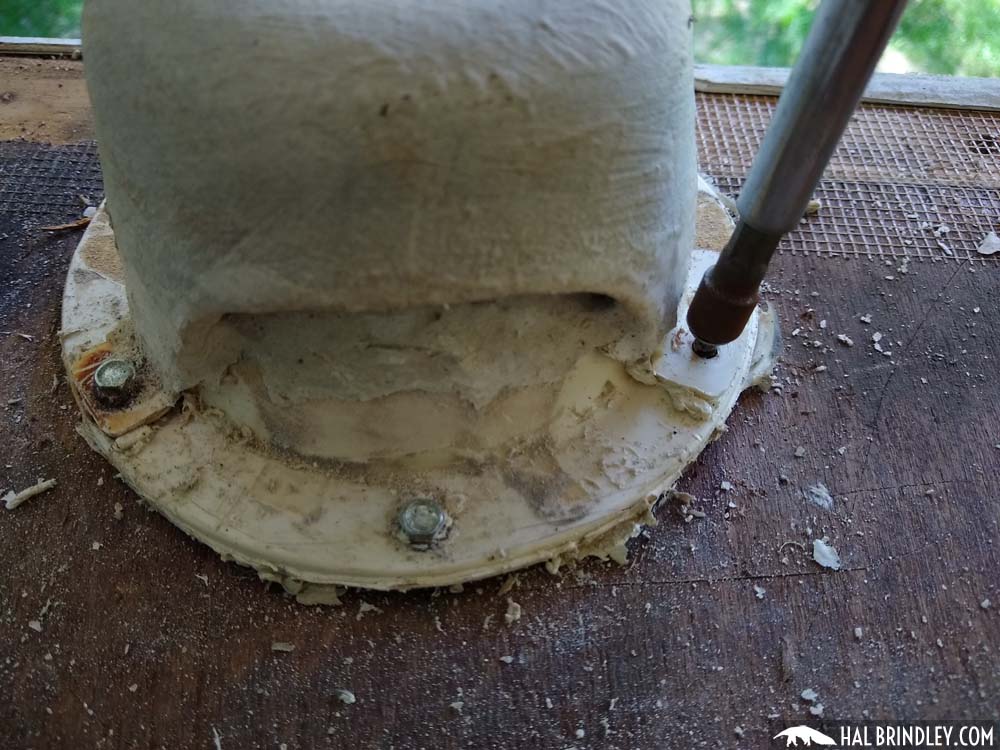
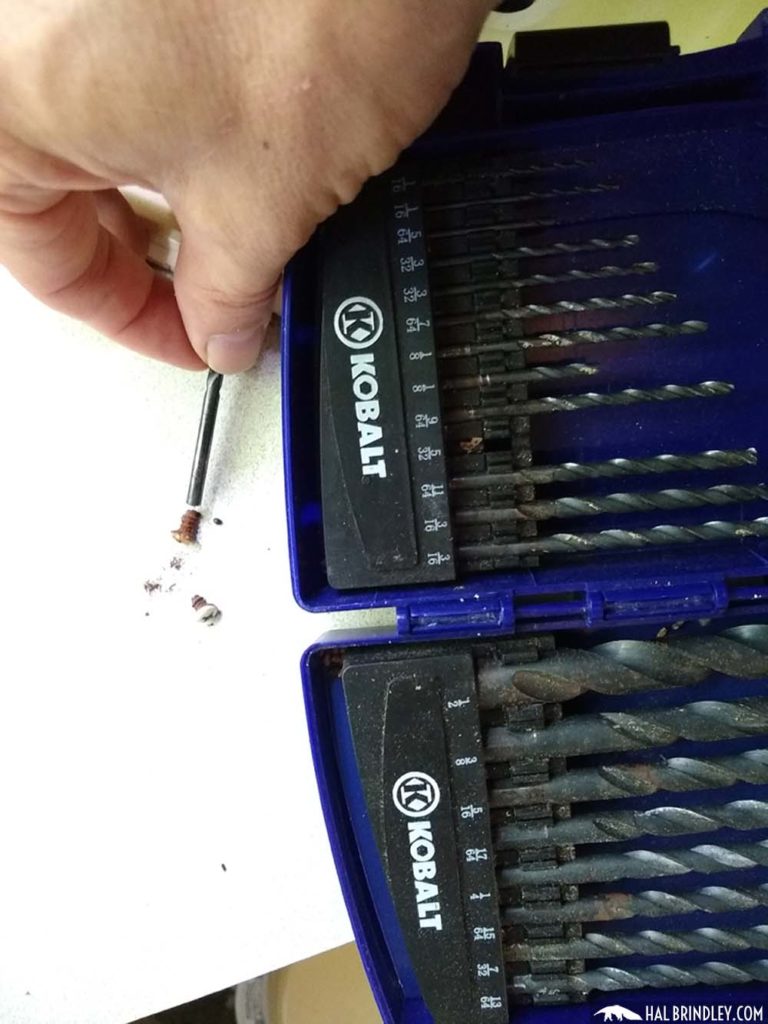
The little screws holding the cover plate to the ceiling were also troublesome. A couple sheared off with a lot of force, but two wouldn’t budge. So I had to drill out the screw heads. I picked a drill bit close to the size of the shaft of the screws that I had already pulled out and started drilling.
HEADS UP! Watch your eyes! Shards of hot metal go flying and that wouldn’t be nice in your eyeballs. Safety glasses recommended.
So I drilled out the heads, one popped off and the other I was getting annoyed with and gave it a tug before it was drilled through. Instead of popping off the screw head, the plastic just melted away around the hot screw head. Whoops. Hope I don’t have to reuse this cover. I figure I’ll put in a new miracle vent in its place. If not, I’ll need wider screw heads when re-assembling.

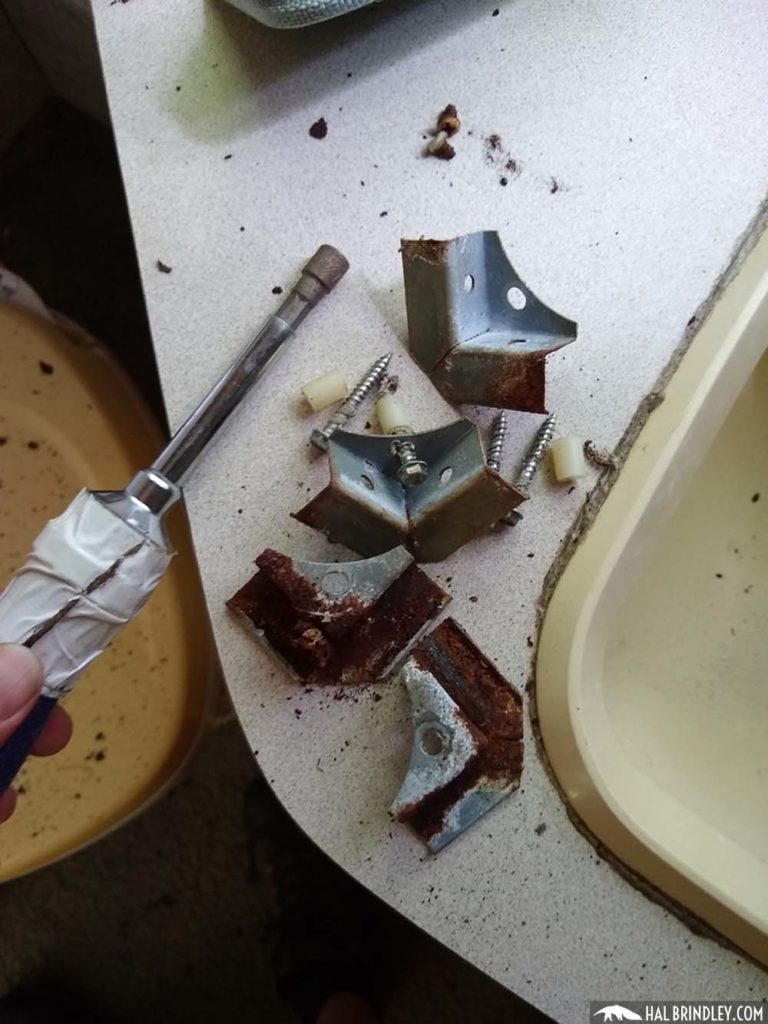
Next I discovered little corner brackets with hex-head bolts holding them in. I unscrewed them (all came out fine thankfully) and pulled out the brackets and little white plastic spacers.


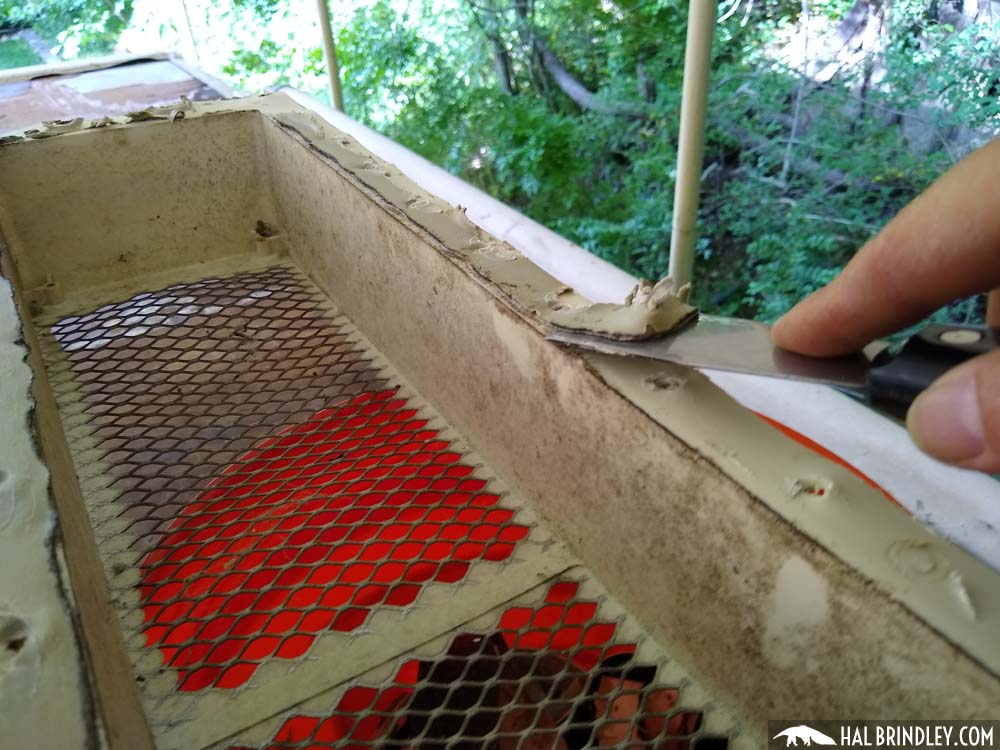
Once the brackets were out I went back up top to pry out the the roof vent. Then I scraped up all the remaining gunk and rubber roofing.
There are two wires running to the roof vent (a black hot wire and a white neutral wire) that you’ll need to clip to remove the old vent. I chose to clip the wires just to the vent side of the wire splice connectors. You may want to make sure your camper is not plugged in to power and your main circuit is switched off before messing with electrical wires. I totally forgot to do this. I think my 15 volt battery is dead (but 15 volts won’t kill you, just give you a zap.) Still, don’t do what I did. Disconnect, switch it off.
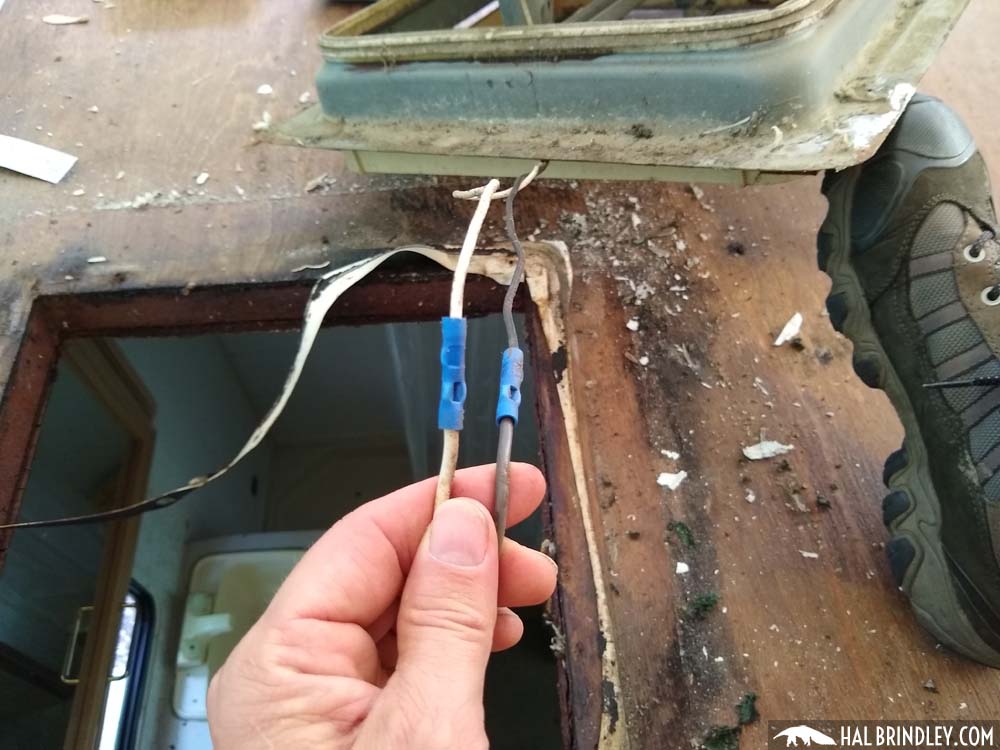
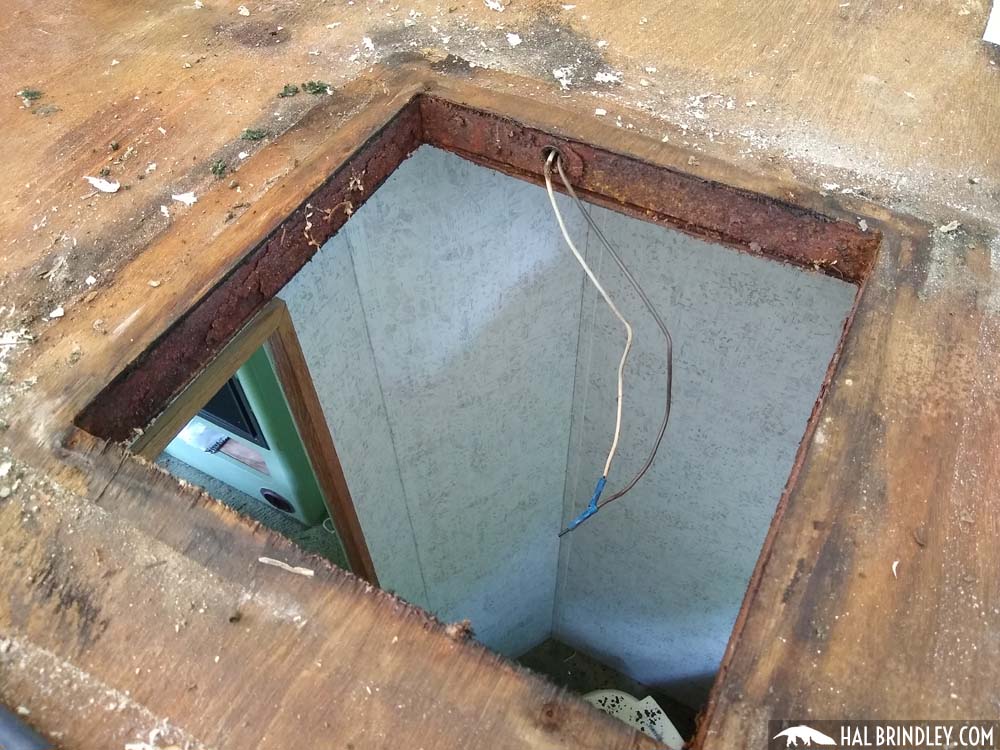
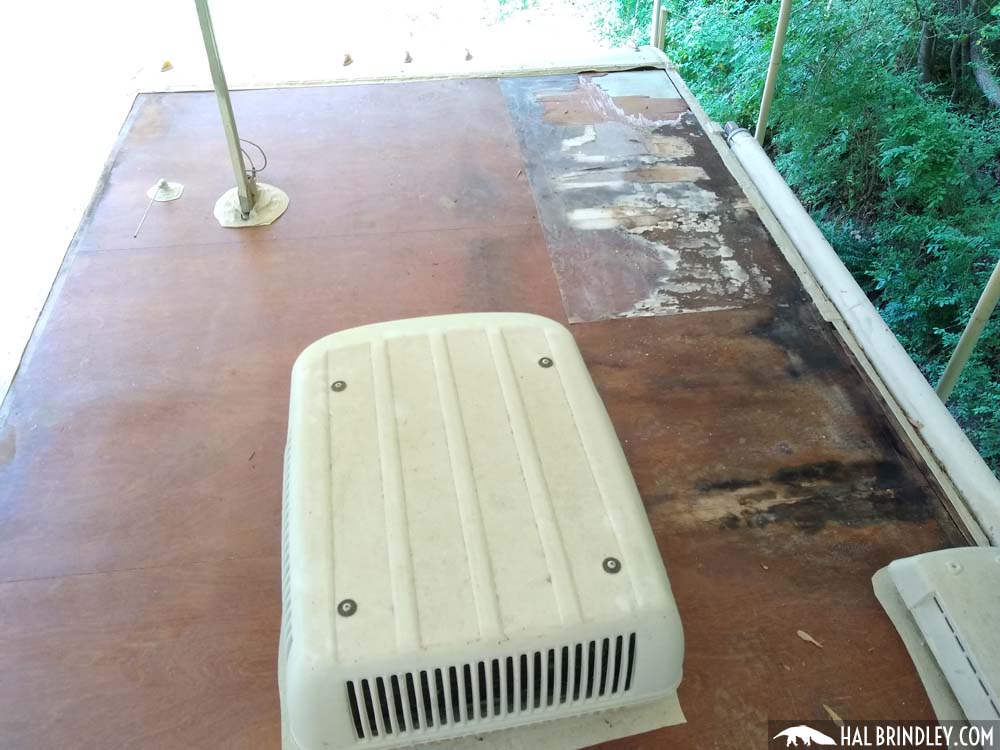
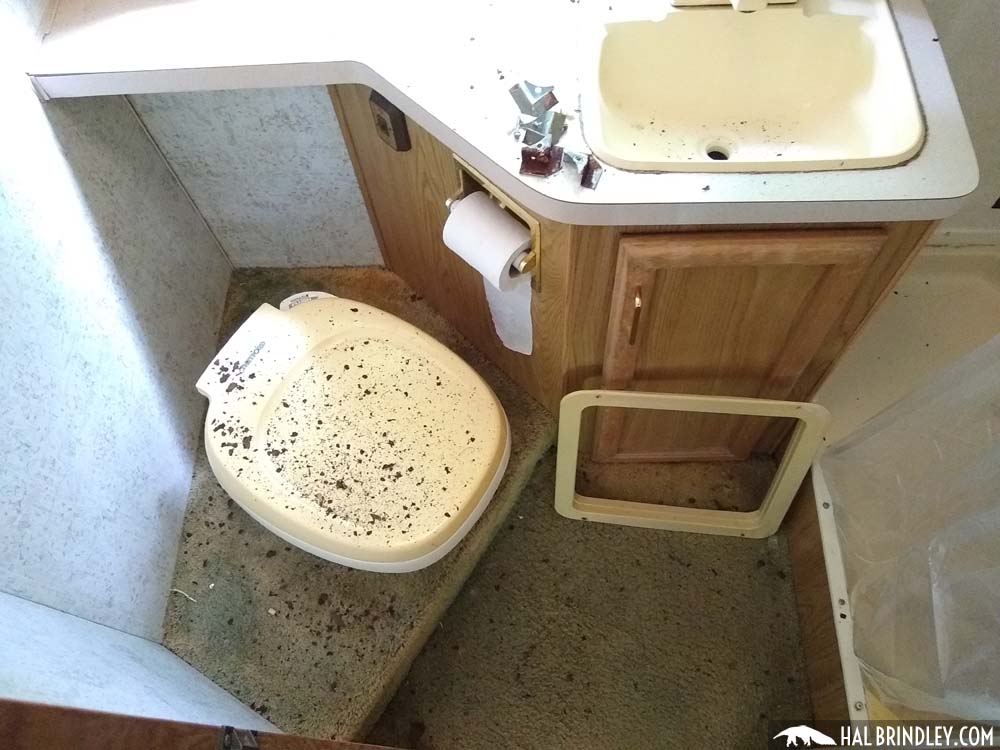
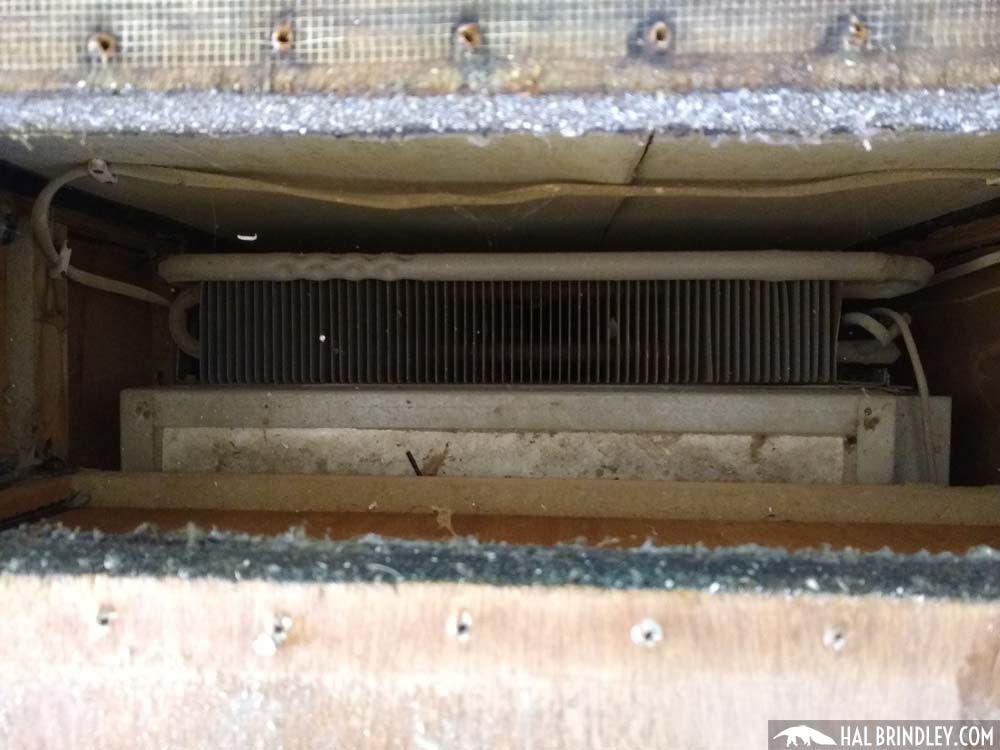
After clipping the wire and removing the vent, I cleaned up any remaining goop and got my first good look at the roof frame. It’s metal! 1 1/2 inches thick. And really rusty so I guess it’s steel. Some RV roofs are framed with wood, others have metal framing. I had no idea what was in my camper until this point. Not too happy about the amount of rust on it, but hopefully it is still structurally sound! I scraped off some rust and made a big mess inside the bathroom.

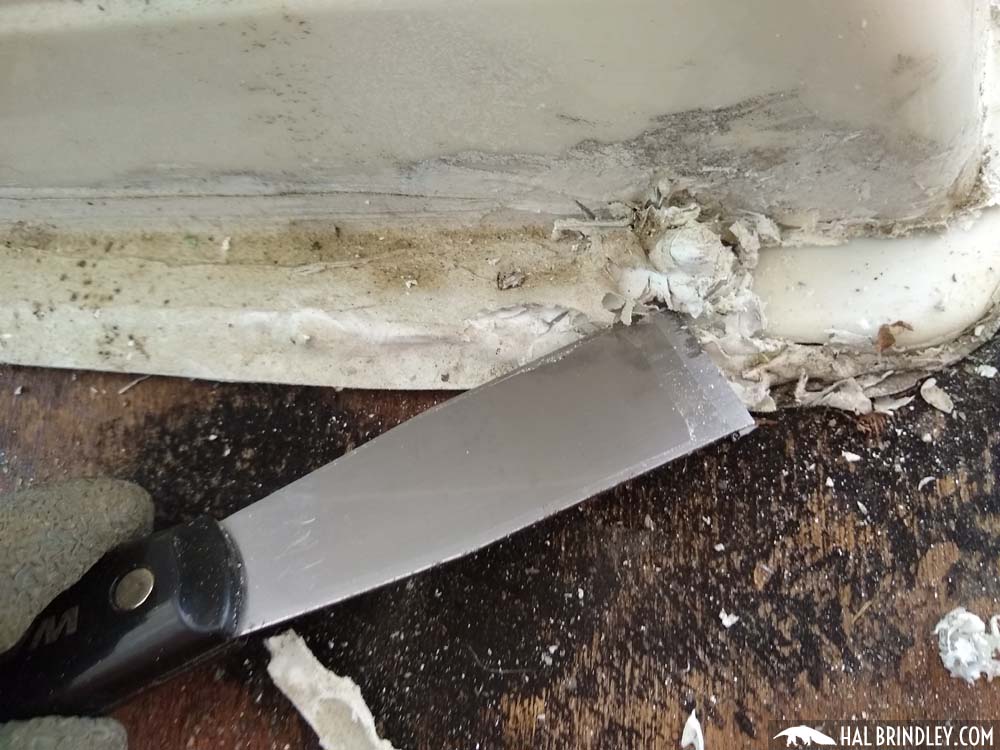
Removing Vent Cover for RV Refrigerator
My final goal of the day was to get the refrigerator vent cover off. I noticed RV sealant blobs at four points on the cover so assumed there must be screws under them. I pried them up and found Phillips screw heads .

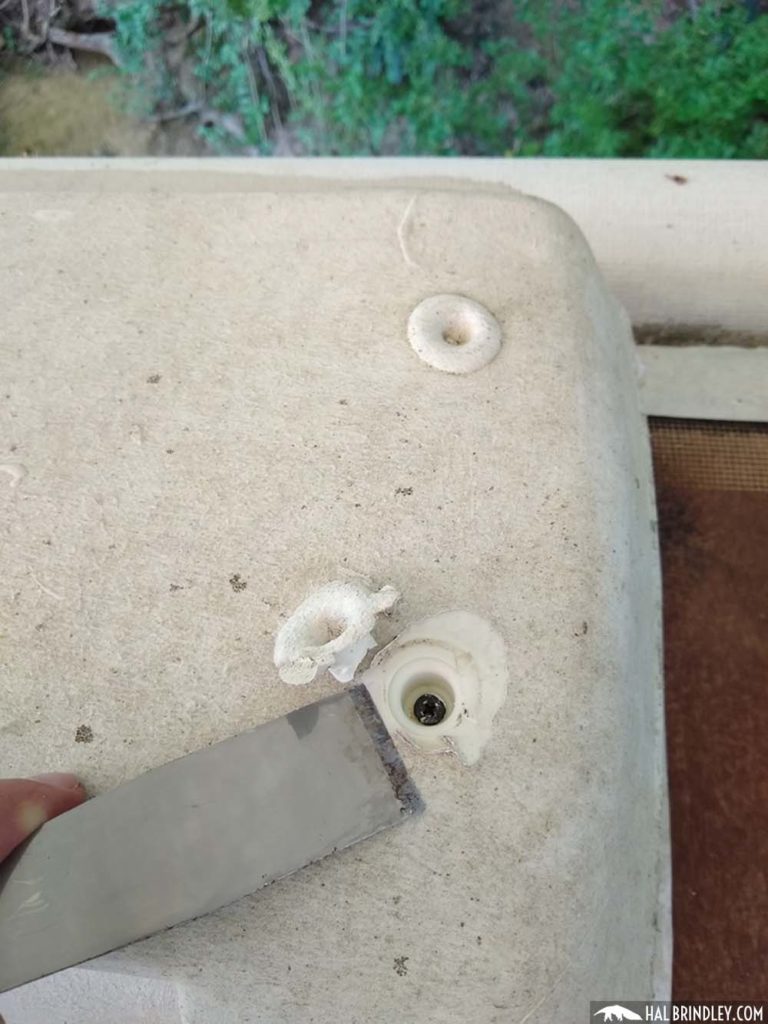
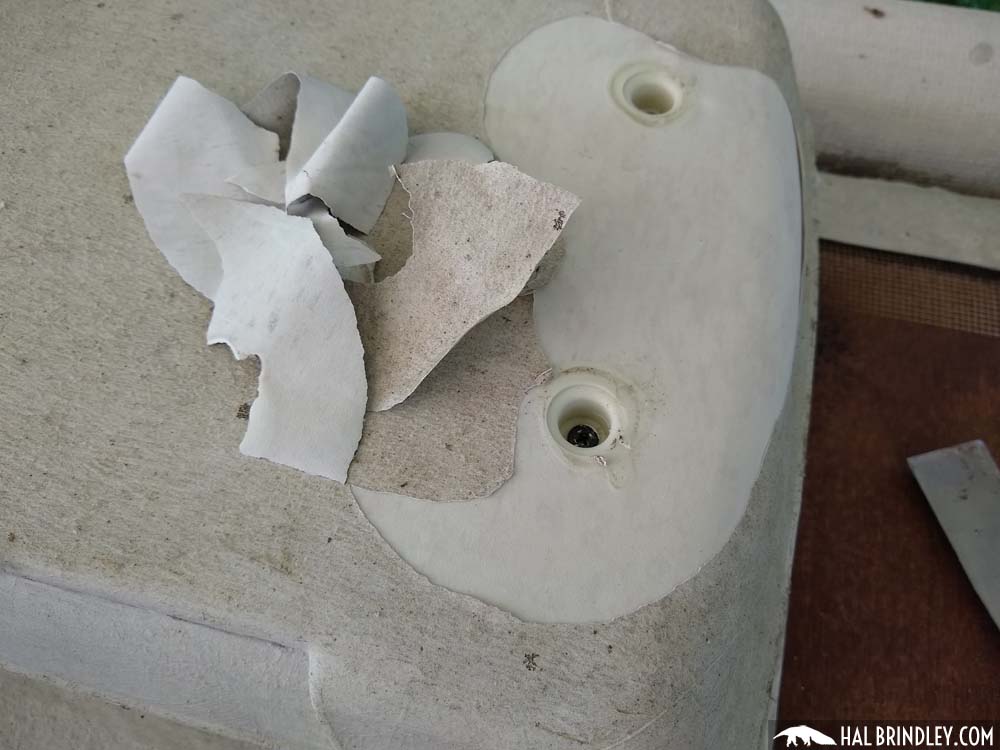
I also noticed that there was a coat of RV roof coating over the vent cap. These coatings are painted on with a brush so clearly whoever did this coating just blobbed in on top of everything. I peeled most of it off, unscrewed the cover screws, and lifted off the cover.
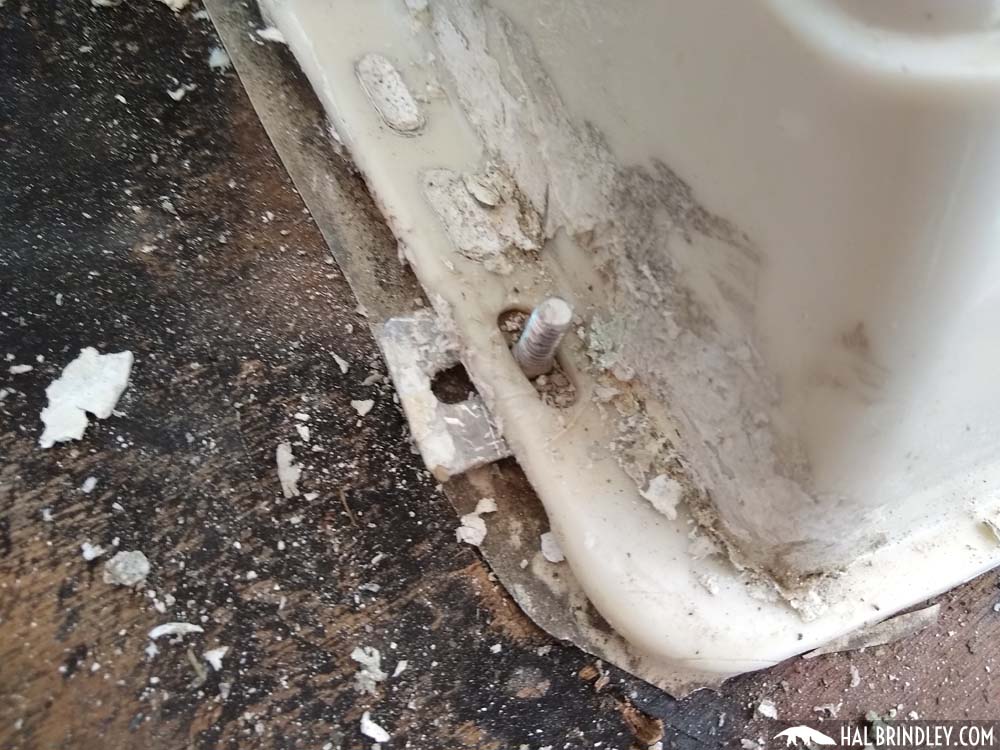
Once the cap is off it’s more of the same. Cutting away more rubber and scraping off RV roof sealant and old caulk. Get comfortable because this sucker has 32 screws in it! Ugh.


Nearly every screw was in good enough condition to remove with a socket driver, but a couple were too rusty and needed to be twisted out with vice grip pliers. Then I pried off the vent, and it came off clean. I peeled off the remaining rubber roof from under the flange and then scraped off the old putty beneath. I’ll clean it better if and when I decide to reuse it. Seems like it’s in decent shape so I probably will.
I scraped the framing inside the opening and discovered that the framing around the refrigerator vent is made of wood (unlike the metal frame around the roof vent.) Then I covered it up with a scrap of wood so I wouldn’t drop any junk into the fins on the back of the fridge!

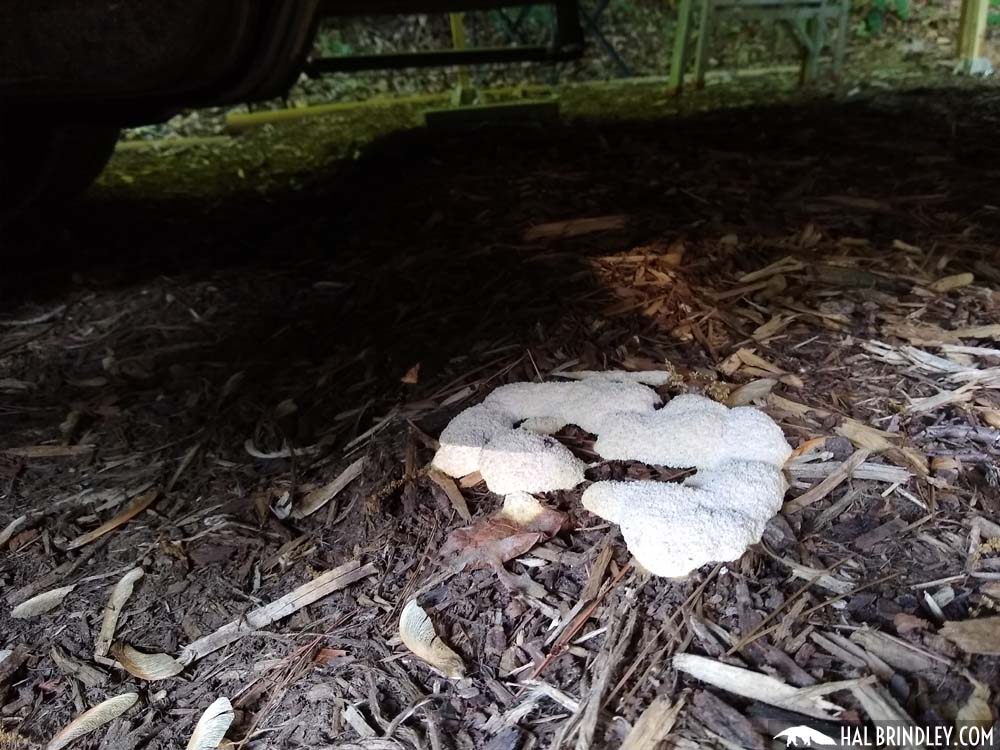
That’s as far as I got on day 1 after about 5 hours of lazy work. Not a bad start. I also noticed this awesome slime mold growing in the mulch under the camper. If you’ve never seen a slime mold, check out some time lapses of them growing! They are freaking amazing!
Now continue to step 2 when I remove the rest of the roof fixtures!